

Active Arts & Crafts Posts


How To: Stitch a bland hem
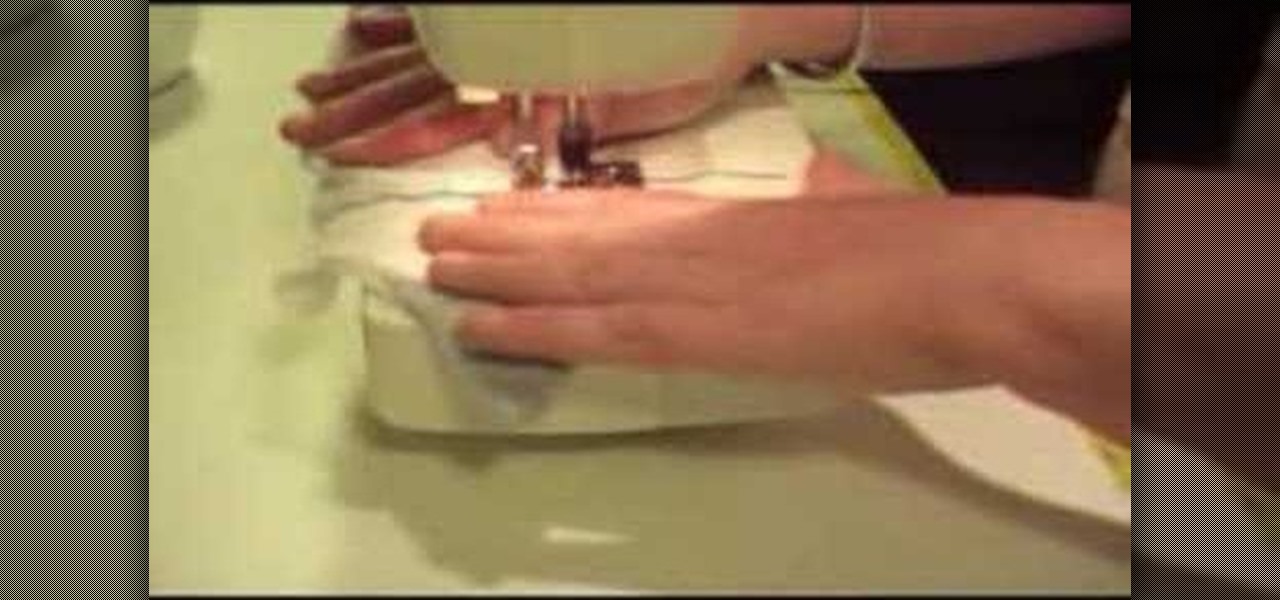
This video demonstrates how to stitch a blind hem. A blind hem does not show stitching on the outer side of the garment, like a pair of pants or a shirt. If you turn the garment you do see the stitching. The reason you don't see the stitching on the outside of the garment is that it's not complete stitching. Depending on your machine it is actually a half of a zigzag stitch and then 3 or 4 strait stitches repeated down the seam. The only stitch that shows is the half a zigzag stitch. Before y...

How To: Soften edges of paper with ink sponges
Stampinmama1 shows us how to soften edges of paper with ink sponges. When you sponge, you get a little softer look onto the paper. You're going to want to use a round stamping sponge and you would want to cut it up into six pieces to have more control over them. Rub your sponge directly onto the pad, grind it on pretty hard. Go right along the edge of your paper, ink it up again and keep going. You will get a soft feathery edge instead of a fairly bland edge with no soft look to it.
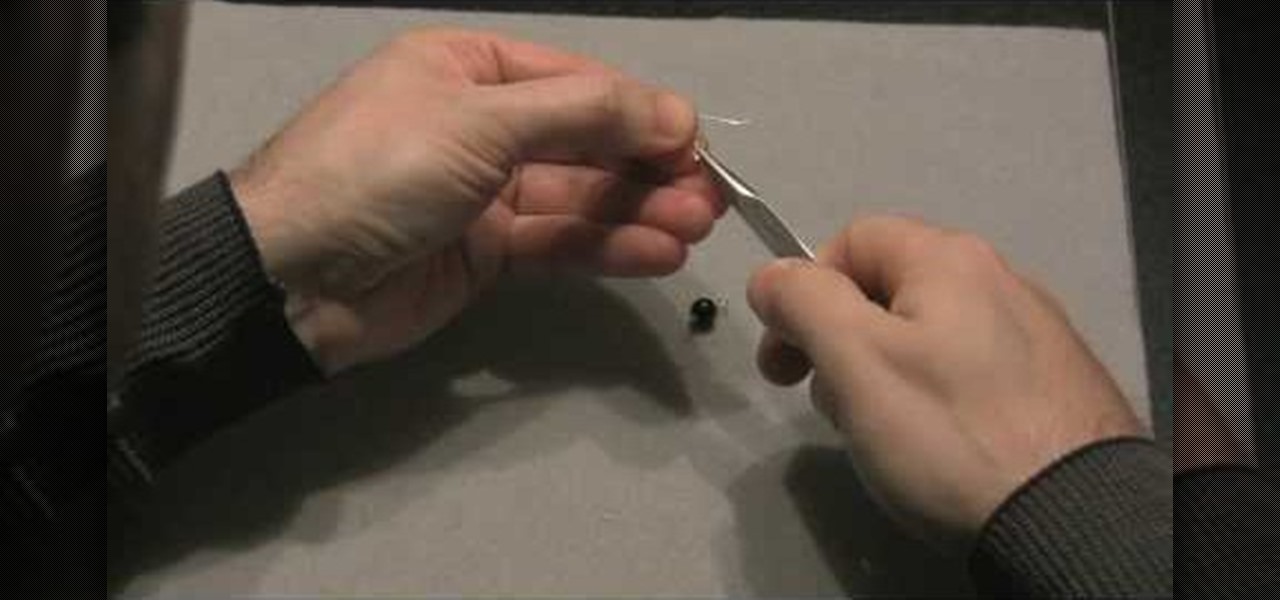
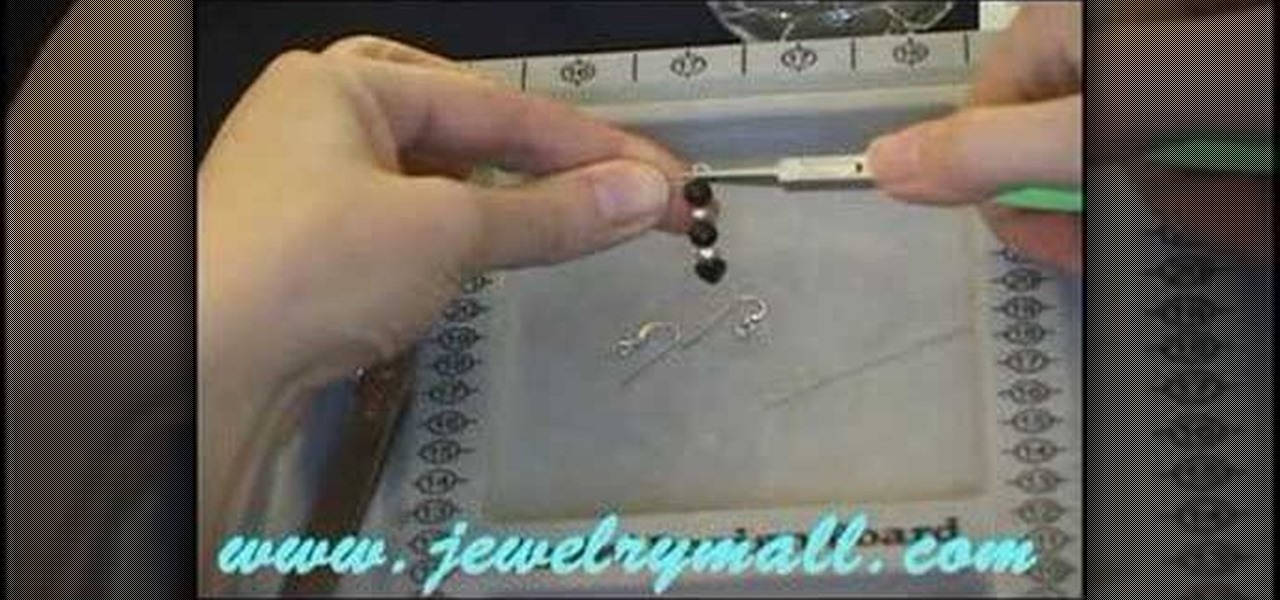
How To: Attach an eye pin to a French hook
In this Arts & Crafts video tutorial you will learn how to attach an eye pin to a French hook. The video is from Jewelry Making Fun. For this you will need nose pliers, an eye pin and a French hook. One way of doing this is to hold the French hook in one hand. With the pliers twist one end of the loop on the French hook to open it slightly. Then put the loop of the eye pin into the loop of the French hook and close the loop with the pliers. The other way is to open the loop of the eye pin, pu...
How To: Make a paper AK-47 replica
Boys and their guns! Make paper replicas of guns is a great way to exude a sense of creativity and have some fun. This video will demonstrate how to create a AK-47 (looks more like an MP5) replica out of paper.
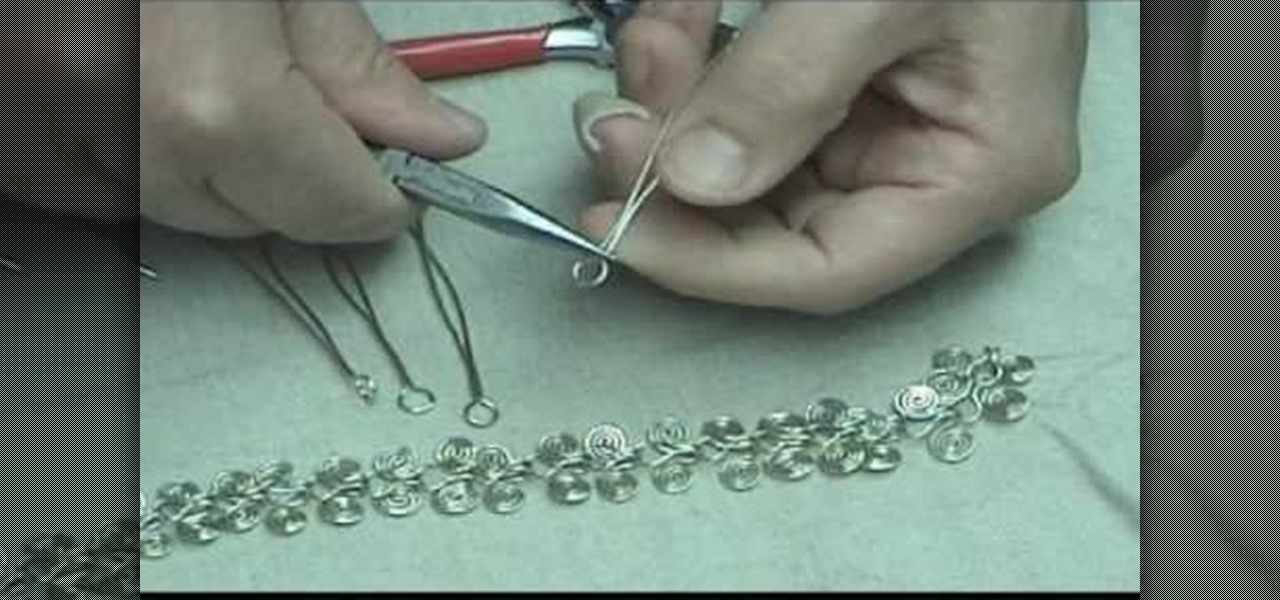
How To: Make a silver figure 8, Egyptian link jewelry necklace
Save money by making your own jewelry at home! Learn how to make yourself a beautiful Egyptian link, figure 8 necklace by following the easy to follow instructions in this two-part video. The wire used in this example is a standard 0.035 sterling silver wire. You can substitute 0.035 with an 18 gauge nickel silver wire (or you can experiment with other wire). In addition to the wire you will need three pliers to make this necklace: round nose pliers, chain nose pliers and diagonal cutters.

How To: Craft a charm bracelet
In this video tutorial, viewers will learn how to make a charm bracelet. The materials needed to make the bracelet are: a light silver plated chain, 100 grams of plain glass mix, 1 toggle clasp and 100 headpins. All these materials can bought from Beads Unlimited. The tools needed for the bracelet are: flat-nosed pliers, round-nosed pliers and cutters. This video is descriptive and clearly explains all instructions. This video is at a slow pace and provides step-by-step instructions that will...

How To: Make a sunset-inspired necklace
Catherine demonstrates how to create an eclectic, sunset-inspired necklace in this video. To create the necklace you must gather 40 yellow bugle beads, 18 orange chip beads, 3 mm red round beads, a barrel clasp, 2 crimp beads, 2 bead covers, about 20 inches of beading wire, clippers and pliers. The design is to start by threading a clap and a crimp bead onto the wire, leaving a 2 inch tail. Then thread on 15 yellow beads, remembering to cover the tail you left with the beads, 3 orange beads, ...
How To: Make upsidedown heart wire earrings
Accessorize your outfit with a pair of adorabe handmade upside down heart earrings! Why shell out tons of cash to walk down the street in style, when you can make your own accessores at home for half the cost!? In this two-part video tutorial, learn how to make wire wrap upside down heart earrings step by step.
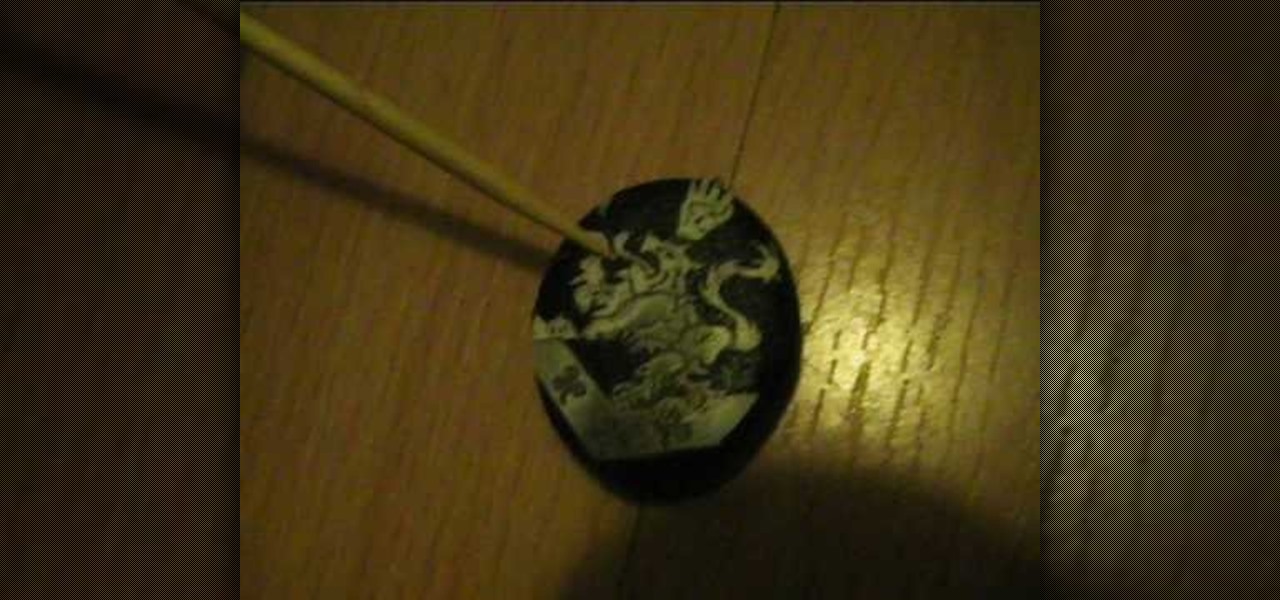
How To: Make an Alice Cullen crest necklace
In this video, Alice demonstrates how to make a crest necklace using simple things. For making this necklace she collects some materials such as oblong shaped rock or polymer clay, some paints, a computer print of a cullen crest and so on. She uses the ordinary black paint to paint the rock completely. Next, she collect a computer print of a layout for the culler crest and carefully cutout the shape and using craft glue she stick it on the painted rock to see it fit. she takes some white pain...
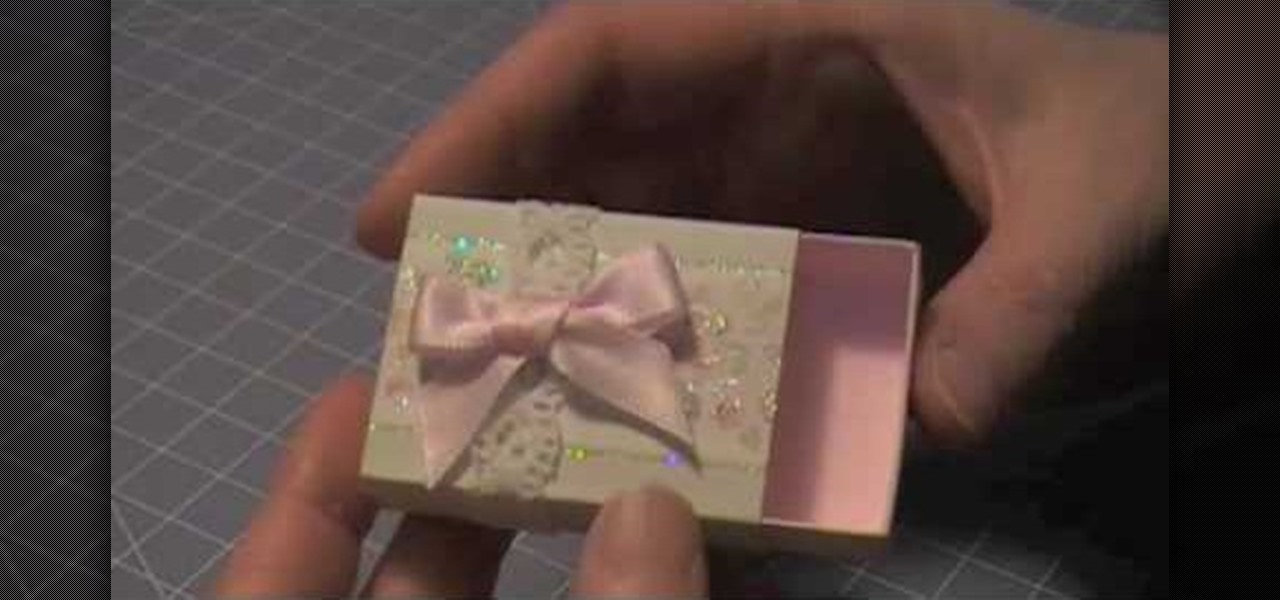
How To: Make a Marie Antoinette inspired matchbox
The Artful Paper Doll demonstrates how to make a Marie Antoinette inspired matchbox. Trace the matchbox template onto a piece of decorative paper. Score the template on the creases and then cut the template out of the decorative paper. Fold the creases up. Affix the creases into a square basket shape with dabs of glue to hold the flaps closed. Fold and glue the ends of the box sleeve together. Slide the basket into the sleeve to form the matchbox. Embellish the box as desired. The box can be ...
How To: Make earrings with gemstones, freswater pearls & wire
Marianna takes us through the process of creating a beautiful set of earrings! For this project you will need two sterling silver head pins, four fresh water pearls, some gemstones of your choice, two sterling silver ear wires, round nose pliers, flat nose pliers, and a cutter. Take your head pin and string your beads and gemstones on the head pin. Next using the flat nose plier, bend the end of the head pin to create a 90 degree angle. Then make a simple loop where the ear wires will be plac...
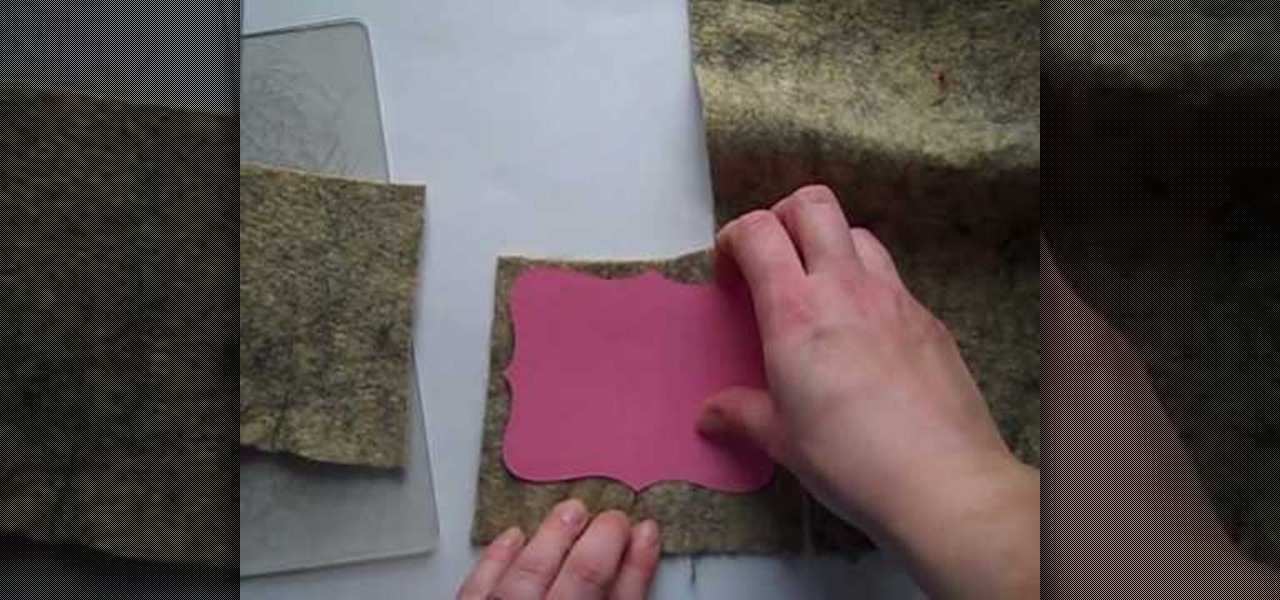
How To: Cut felt with the Big Shot
First cut out card stock using the Big Shot Dye. This card stock is great as a template to make sure you are getting the most out of your felt. Cut out pieces of your felt around your card stock template trying to get as close as you can to the border of the card stock. Next take your Big Shot machine and place your cutting plates on the bottom, as well as your dye. Then layer your cut out felt pieces on top of your dye. Start rolling your felt through by cranking the handle on your Big Shot....
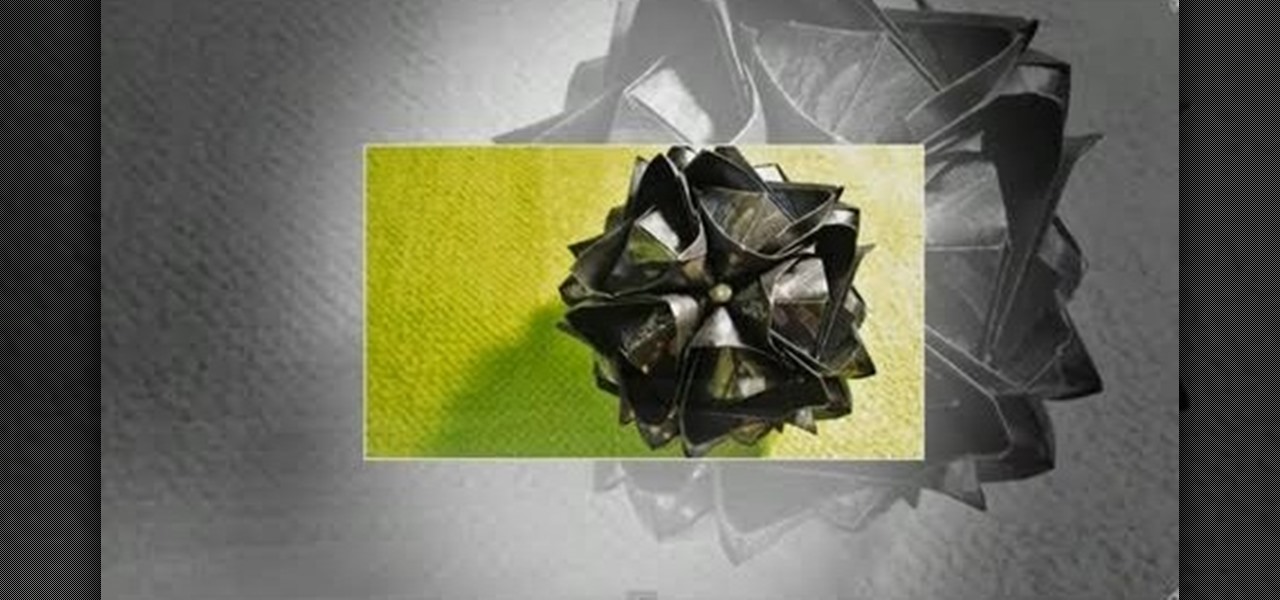
How To: Fold a 3D origami blutenball kusudama
This video tutorial demonstrates how to fold a Bluten Kusudama. For this we have start with an eight by eight cm piece of paper. Fold it into half. Fold the half into another half so as to make the paper into four equal parts. Now fold this into half creating a cube. Now open the paper we can see that there are eight equal parts. Again fold the paper from one corner to the first vertical fold. The first vertical fold will meet the center fold, creating an oblique. Now fold in the same way in ...
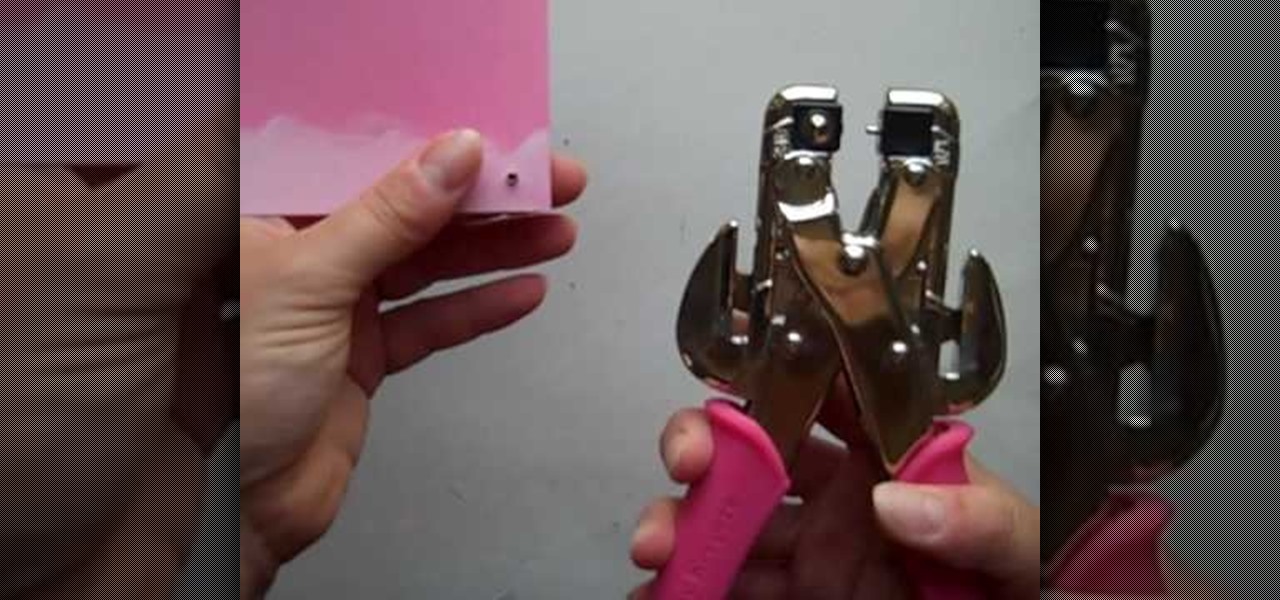
How To: Use the Crop-a-dile to set eyelets
In this video tutorial, viewers learn how to use the Crop-A-Dile to set eyelets. The Crop-A-Dile is a tool that can punch holes and snap eyelets. The sides of the tool allows users to set a measurement for hole punching. This allows for users to make accurate and straight holes. Then put the eyelet on the hole and use the middle part of the tool is set it. Simply squeeze it to bind the eyelet to the paper. This video will benefit those viewers who enjoy making arts and crafts, and would like ...

How To: Make fish-shaped earrings
This video is in the Arts and Crafts category and you will learn how to make fish-shaped earrings in this video. It is really very simple and easy to do this. You will need some silver plated rings that have hooks at one end and round nose pliers. First, press the hook with your fingers to give it the shape of a fish. Then with the pliers, bend the non-hook end of the ring backwards to form the tail of the fish. Now you have the fish-shaped earring. You can hook it into another ring and you h...

How To: Make a zig-zag Chinese staircase bracelet
In this video we learn to make a zigzag Chinese staircase friendship bracelet. You can go wild and make it all different colors or all one color. You start off with 5 strings about a yard long and fold then in half. Then you make a knot creating a loop for the end and to hold to a nail or clip while you make it. Take a strand and make 5 forward knots. With the same strand you then do 5 backward knots. Repeat this one time, so in all are 20 knots and then switch color, or to another strand. Do...

How To: Stitch a EZ cross stitch frame
In this video tutorial, viewers learn how to use the Stitch EZ Cross Stitch and Needlework Frame. This frame is designed to provide hours of stitching enjoyment without pain to the hands or damage to the fabric. It simply is held under the edge of your leg. It allows users to work with both hands, allowing users to stitch much faster. It has a magnetic needle holder and it can flip over. The panel is also removable and has 3 adjustments for the height. This video will benefit those viewers wh...
How To: Make a Victorian-inspired necklace using a ribbon
This video is in the Arts and Crafts category and you will learn how to make a Victorian-inspired necklace using an old ribbon. This is a very simple and easy way of making a necklace. Take a ribbon of about an arm’s length, tie it around the neck and check that the length should be OK. Then you can take a bunch of beads or a flower or some such suitable item which is fixed on a wire to put on the ribbon. Tie a knot around the wire and then turn the wire around the ribbon and your necklace is...
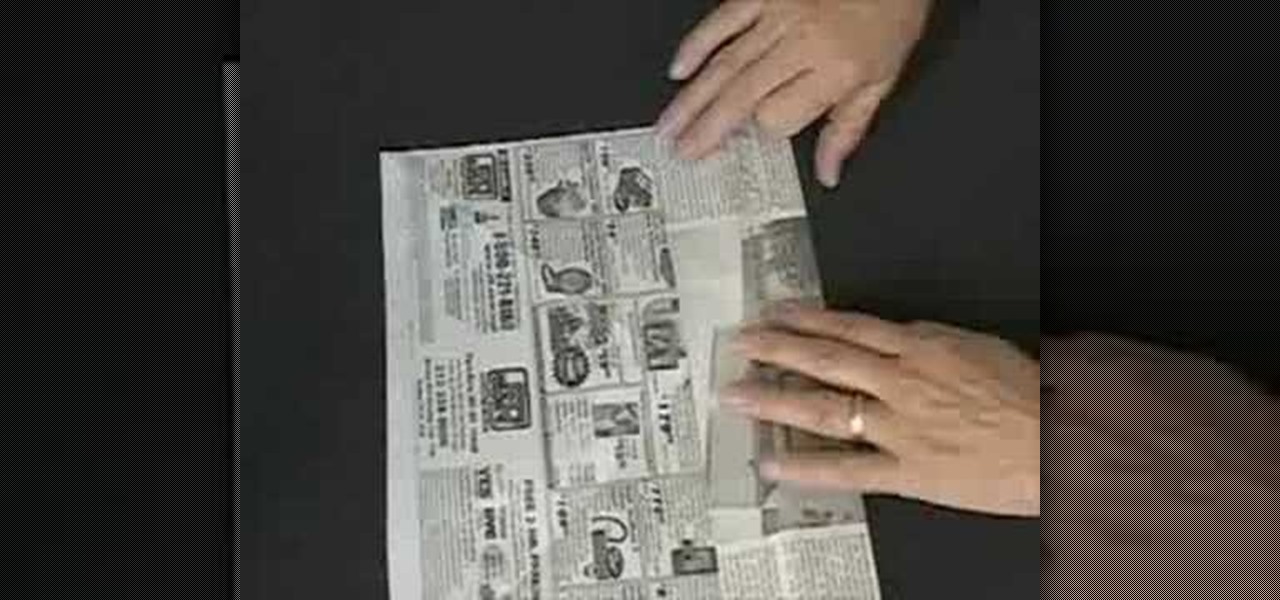
How To: Make a paper box using newspaper
Have you ever thought about creating small boxes out of newspaper? Tomoko Lipp shows you a simple folding and cutting method to do this. Making these can be another way to recycle and be environmentally conscious. You might also consider using them for a unique gift box idea or for storing small items. All you'll need is some newspaper, a pair of scissors, and a pen to mark a few measurements.

How To: Sew an arm/leg warmer for a baby or toddler
Vanessa is teaching you how to make arm and leg warmers for babies or toddlers. She is simply using some socks that she got by going to the dollar store and buying them. They only need one seam. You need to cut off the top of the sock first. Then you cut the heel and toe off the remaining sock piece. You need to fold the bottom part of the sock in half and make it into a loop. Put the loop over the raw end of the top of the sock. This will make it so all of the round edges are together. Stitc...
How To: Make a carnival themed paper doll
To make a carnival themed paper doll follow these steps. First cut out all of the body parts for your paper doll. You may use any type of patterned paper that you would like. Next decorate the paper by adding more paper, sequins, drawings, etc. Next punch holes into the body parts so that you can put them all together by using string. Next you can make the dolls clothes out of paper, small flowers, sequins, glitter, etc. Finally you should add the clothing to the finished doll body and finish...

How To: Make a braided bookmark
A braided bookmark is pretty easy to make and can be a neat gift for a pal. This video tutorial teaches you how to make a braided bookmark using multicolored paper strips. Choose your favorite colors and even add some personal flair for the perfect design.
How To: Use distress powder
Looking to try some new techniques out for your scrapbook pages? In this video tutorial, learn how to use distress powder to get that great distressed look for your pages. Also, learn how to take this technique a step further with UTEE & make the distressed a little glossier and polished looking.
How To: Make a fleece blanket with crocheted edges
If you would like to crotchet around the edges of a fleece blanket you will need a fleece blanket, yarn and a hook. You will first need to clip holes in the blanket with a slip stitch blade. These wholes will distinguish where the crotchet chains will go around the fleece blanket. The slip stitch will leave you with holes so you can crochet around the blanket. You should do a foundation slip. Start by doing a slip stitch and pull your needle through the back and from the front complete the st...
How To: Do a blanket stitch
In this video tutorial, viewers will learn how to do a blanket stitch. Begin by threading your needle. Then put the needle through only one side. Now run the needle through the other side, at the same place. Run another one through the same place to bind the edge. Now run the needle through the top bound stitches. Now run the needle from behind and go through. Put the needle through the loop of the thread and pull it tight. Continue this for this rest of the stitching. This video will benefit...

How To: Make a squiggle ring
Mark Nelson shows how to make a very simple ring using a squiggle technique in this video tutorial. You will need 6 inches of 16 gauge silver wire (or whatever type of wire you want to use). You will also need 6 inches of copper wire (16 gauge), which will act as the template. Take the ring sizer and bend the copper wire to make whatever size ring you need. Use clippers to create the template. Use pliers to straighten out this template. Place this template in the middle of your silver wire ma...
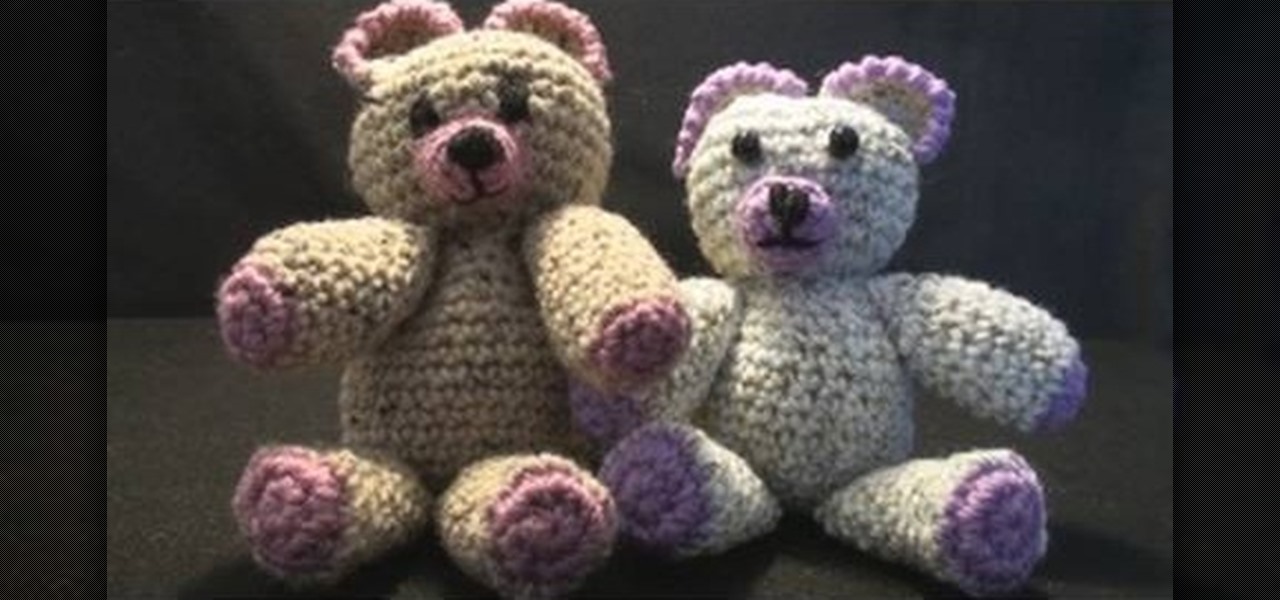
How To: Crochet a left-handed Ogeechee bear
Using a size g four millimeter crochet hook, and four ply yarn Teresa shows you how to make a crochet bear. We start with the magic circle, and work six single crochet through the center. Pull the center rope close. From this point onward she begins detailing how many loops are in each part while the video demonstrates her completing the loops in each of the color segments. Piece by piece she combines the pieces together until she has created a crochet bear. Completing this project would take...

How To: Make an H2O locket
This video tutorial is going to show you how to make an H2O locket. You will need a snake chain and a couple of clothing studs. Take two clothing studs, bend the spikes and glue them together and let them dry. Use Krazy Glue or Super Glue. Regular glue will not work. Then you take the snake chain; put it snugly around the clothing stud and glue them. Just make sure you don’t put too much of glue. Otherwise, the glue will show and make the locket look shabby. Watch the video for further instru...
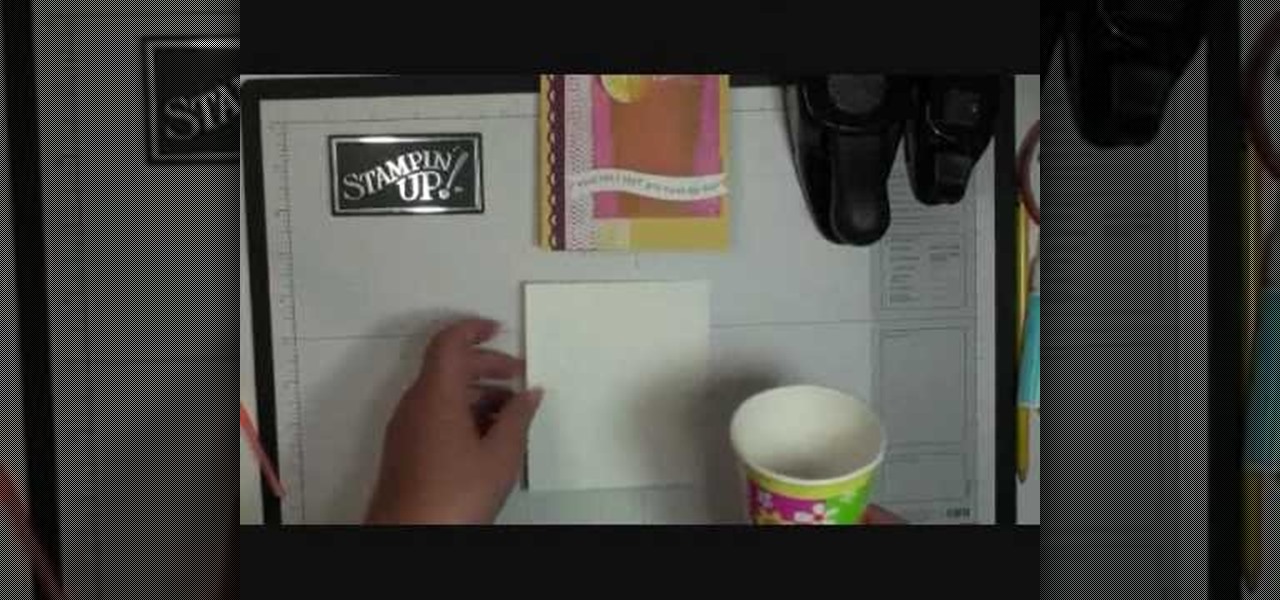
How To: Make a 3D lemonade cup card with Stampin' Up!
Dawn Griffith creates a cute card with a 3D lemonade glass embellishment from start to finish. Create a template by making a rough sketch of an 8 ounce paper cup onto a piece of white cardstock and cut it out. Take the template and either trace it onto a piece of vellum cardstock and cut it out, or use Dotto adhesive to attach the template directly to the vellum and then cut around the shape. Score each side at about 1/4", fold on the score lines and trim the overlap at the top. Apply sticky ...

How To: Make paper tissue flowers
Decorating using tissue paper is an inexpensive and it is much prettier than streamers. To make tissue paper flower, all that you need is tissue paper of your color. Have two shades of color for contrast to make it more attractive. Cut the tissue paper into half. Take eight sheets and cut them half which gives you sixteen sheets. Take six to eight of those and lay them on top of each other and make corners match up. Now take the tissue paper and fold it over half inch to one inch and then fol...
How To: Make simple gemstone bead earrings
Learn how to make beautiful beaded earrings with this instructional video! The tools you will need are two head pins, ear wires, a pair of pliers, tweezers, and a nail clipper. First start off by choosing your favorite combinations of beads. Begin by stringing the beads in any order on the head pins. Next you will need to close the head pin off. The easiest way to do this is wrap it around with the pliers. You do this by easy twisting around the earring. You make sure to make a round loop whe...
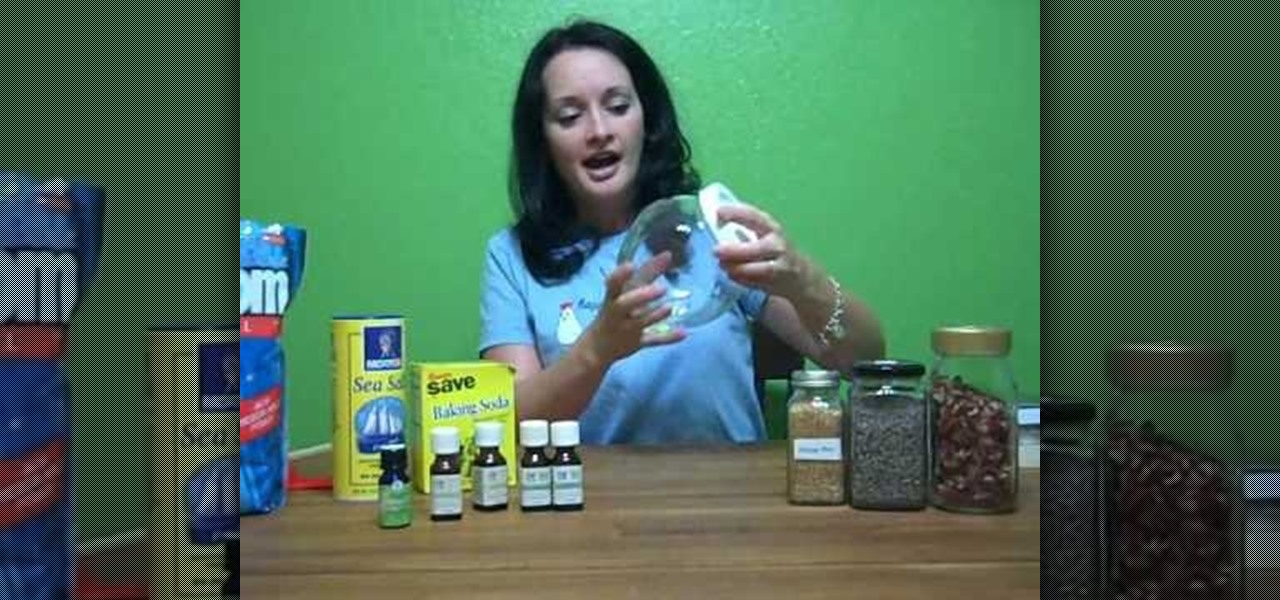
How To: Make herbal & essential oil bath salts
The main ingredients needed in both herbal and essential oil bath salts your main ingredients needed are Epsom salts, baking soda (not needed if salts will be used immediately), and sea salt. For the essential oil bath salts you will need essential oils, and for the herbal bath salts you need whatever herbs or rinds you like. You will also need some sort of container to put the salts in, and measuring tools. For the essential oil salts, fill a jar about halfway with Epsom salts, then add a ge...
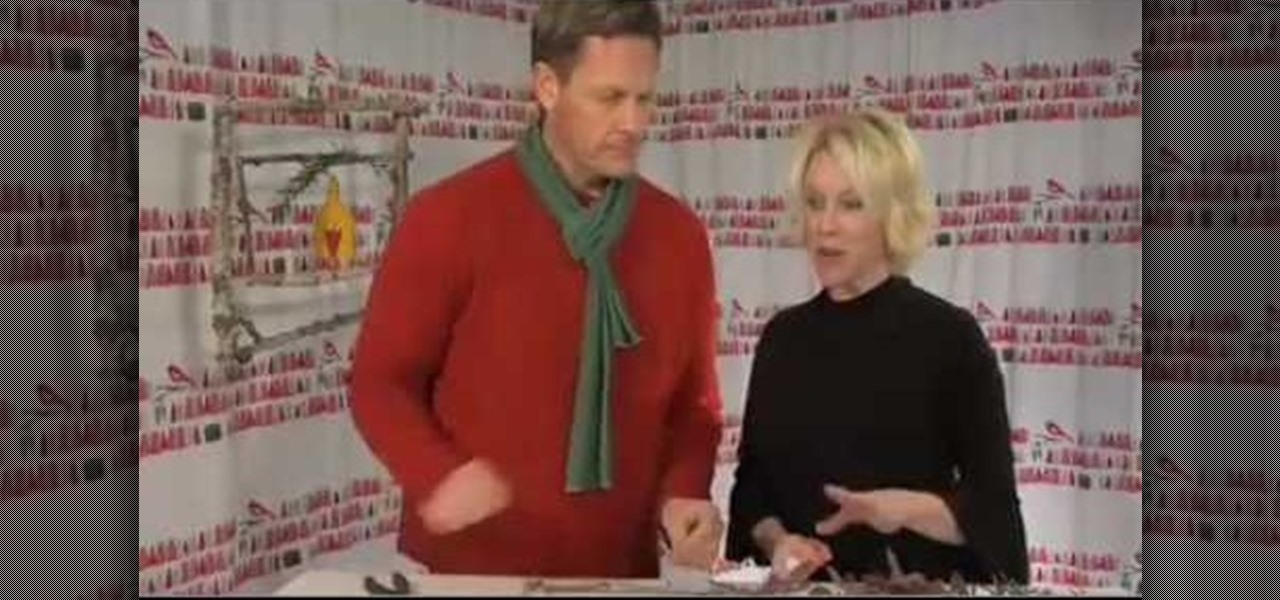
How To: Make a great looking holiday wreath
Six Minute Style host Susan Doherty is on location in Montana at the Nine Mile School house with Kurt Seer who shows how to create a 3 dimensional wreath mobile. He uses birch as his base. You can use any wood you choose. Make a square out of four branches. Knot, tie and twist floral wire at cross sections of the wood frame. Leave a little tail for the decorations. Tie dried rosemary in the wire tail. Tie leaves and greenery around the frame using wire. Not only for Christmas, you can create ...
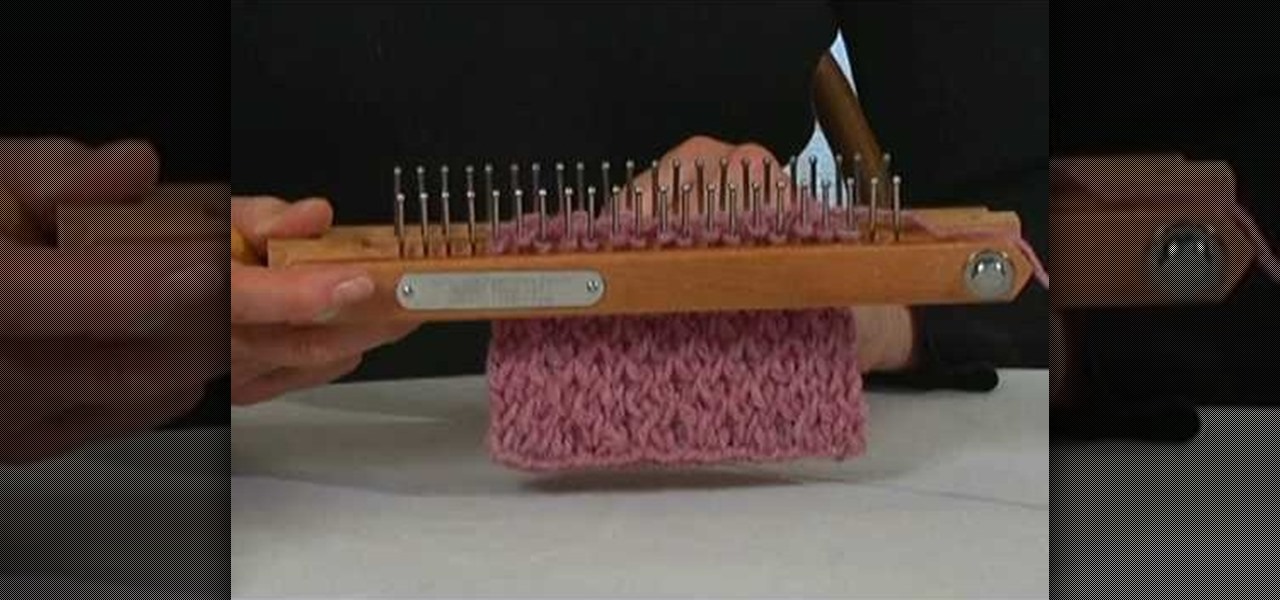
How To: Do a criss cross stitch on a knitting board
The instructor from the Knitting Board shows you how to make a criss cross stitch. This stitch has two weave patterns that you alternate to create a pretty textured look. Using a knitting board, the first stitch starts on the first pin of the back board down to the fourth pin. Then you weave back and forth across the board skipping a pin. At the end, take the yarn straight across the board and turn the board around. Return by picking up the pins that you skipped. Each pin will have two loops ...
How To: Make a book weight
If you're looking for a solution to keeping your books open during a read, you might have considered using a book weight. In this video tutorial, the author will be showing you how to make your very own homemade book weight using a few inexpensive house hold products. The entire procedure can be completed in about 10 minutes, and all you need is some uncoated lead shots, a bag of lentils, a zip lock bag and a sock. You will also need either a sewing machine or a needle and thread to keep the ...

How To: Emboss on metal to make a metal craft embelishment
Terri Sproul shows how to use a really cool technique to make an embellishment for a card. You first need to find a roll of aluminum that is self adhesive. Work on the back of the aluminum, the side with the adhesive. Use a stamp to lay out your design on the back, by stamping the image on the back. Then you must trace the outside of the image. Use alcohol inks to add color to the aluminum. Then she cuts the image out with her scissors. Then she uses a glue dot to place the piece on a card sh...
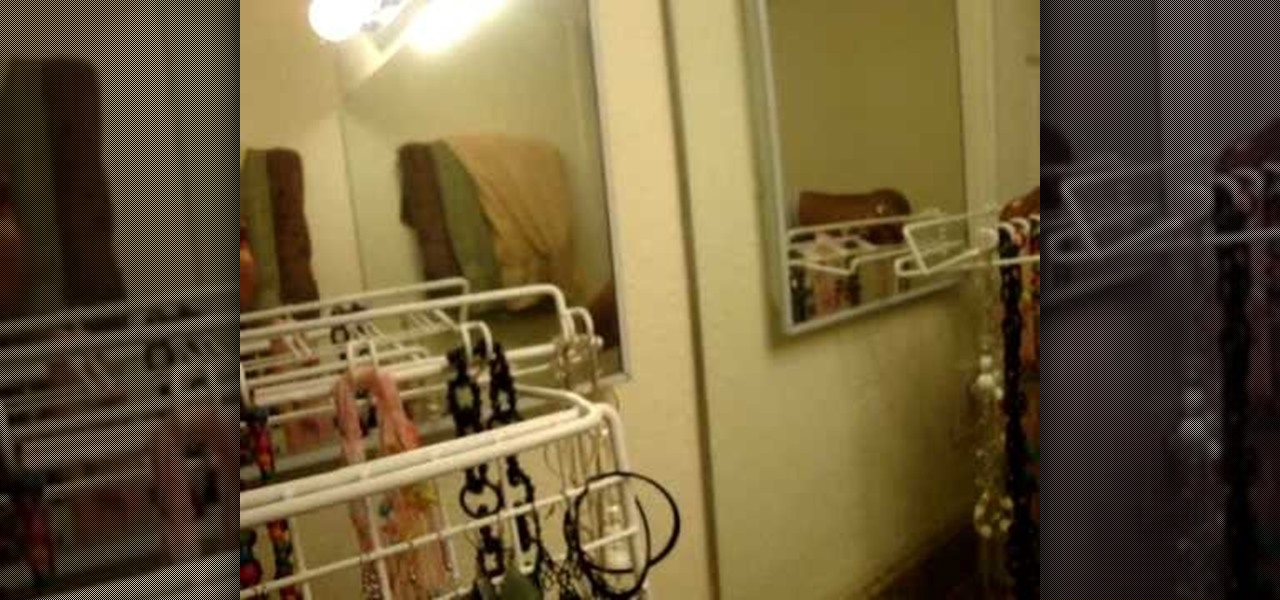
How To: Make a neat necklace & earring organizer
For anyone with jewelry sets consisting of earrings and a necklace, learn how to make this organizer to avoid tangles, broken pieces, or mismatched sets. Go to any Wal-Mart store and purchase a stacking shelf, which has a grid pattern. This will be used for your earrings. You will also need a towel rack (also from Wal-Mart), which will hold all of your necklaces. Bend one of the legs of the stacking shelf, so that you can have the shelf sit vertically without falling over. Because it is a gri...
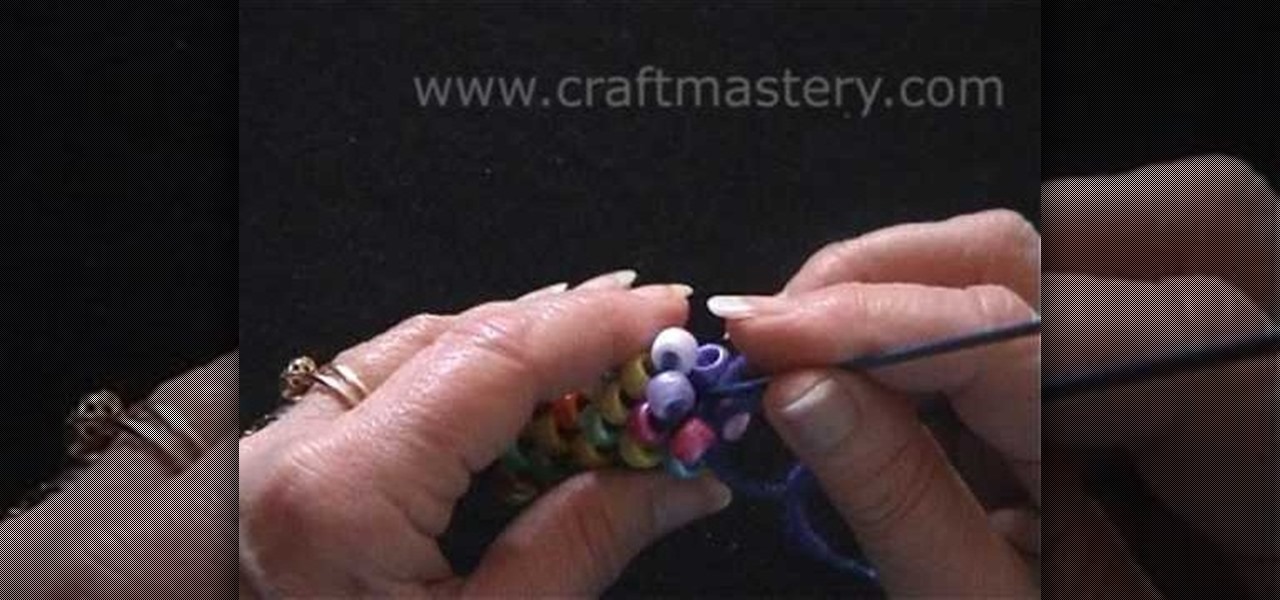
How To: Crochet a bead rope necklace
For anyone interested in learning a new jewelry technique, this video tutorial shows how to crochet a bead rope necklace. You can use large pony beads like the video tutorial, or use much smaller beads. The pony beads are suggested for beginners so that you can see what you are doing. To begin, thread all of the beads you will use onto your yarn. You can alternate colors or place them onto the string at random. Both techniques will yield two different effects. Begin with six chains slip stitc...

How To: Make your own wreath from scratch
In this video, Meg will show you how to make your own wreaths. You’ll be creating two scenes on your wreaths : a woodland and an aromatic one. You’ll need 2 cardboard rings (one slightly smaller) cut in wreath forms, green moss, a hot glue gun, a knife, some pretty fabric, and a handful of old corks.
How To: Make a simple pair of headpin loop earrings
In order to make a simple hair pin you need a couple things first, a small and big bead (although you can use other items), an ear wire and a head pin. Tools that you will need are a pair of round nose pliers and a pair of cutlets. Now take the head pin and loop the beads through it. Take the nose pliers and bend it, about half way up the head pin and gently bend it with your fingers, making a 90 degree angle. Twist the pliers up and bring the head pin over the nose pliers. Then twist it cloc...