

Active Arts & Crafts Posts


How To: Make a paper football for 1 dollar
In this tutorial, we learn how to make a paper football for 1 dollar. First, grab your paper and fold it in half length wise. Next, make sure the crease is nice and clean, then fold it length wise once more. Now, fold one of the corners up into a triangle shape, marking the crease exact. Fold this up again and keep doing this until you get to the end. Once you reach the end, fold the other end in twice into the pocket you see. Crease this, then stand it upright and flick it with your other fi...

How To: Make beeswax candles
In this tutorial, we learn how to make beeswax candles. To make this, you will need thread for a wick and a small bucket of beeswax that is melted on a hot surface. To start, cut the wick thread into even strings, you will only need two of them. Next, place the strings into the wax and dip them in until they are coated. When finished, let the strings dry and continue this will several other strings to make even more candles. Continue dipping the strings and letting them dry so you collect mor...
How To: Create a dangerous-looking, fast paper plane
Chances are you could probably fold a paper plane with your eyes closed. A paper plane is one of the first crafts a boy learns, usually followed by smoke bombs and paper guns that shoot paper bullets (surprisingly these guns really do work, and the bullets can hurt).

How To: Easily make a paper turkey
In this tutorial, we learn how to make a paper turkey. You will need: a pen, tape, scissors, and papers. First, outline your hand on all the pieces of paper, then cut them out. After this, stack them together and then tape them. Next, cut out and apply the wattle of the turkey. Next, draw in eyes and feather details on to the turkey. When you are finished, you will have a cut turkey made in just a few minutes. This is a great project to do with children and only takes a few short minutes. Whe...
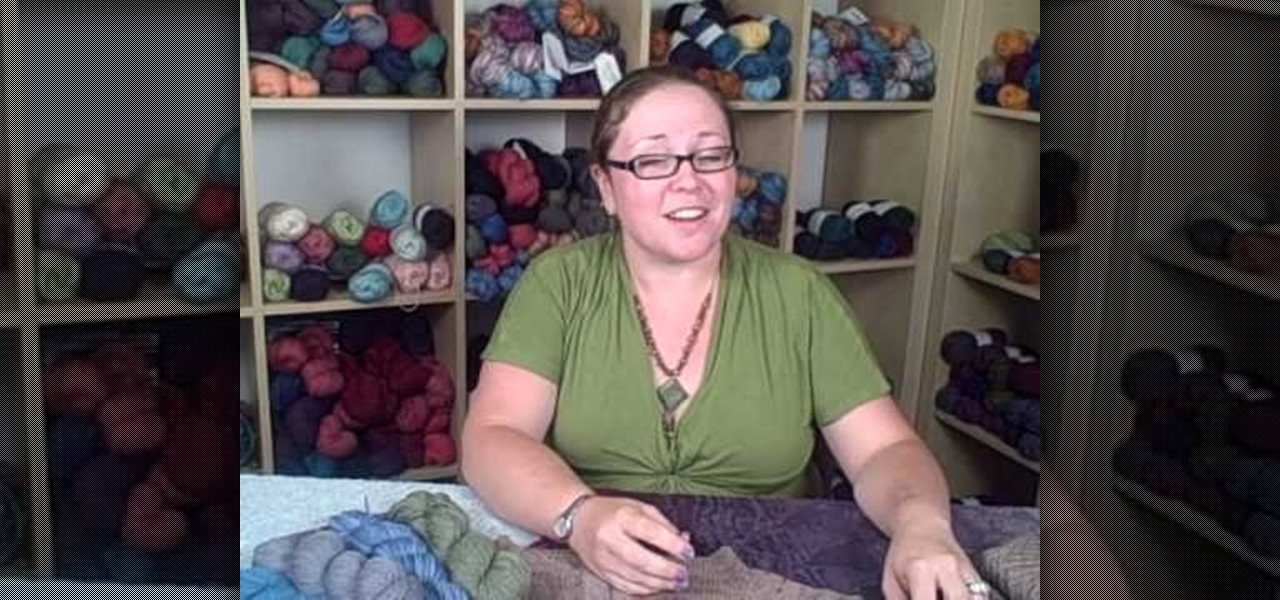
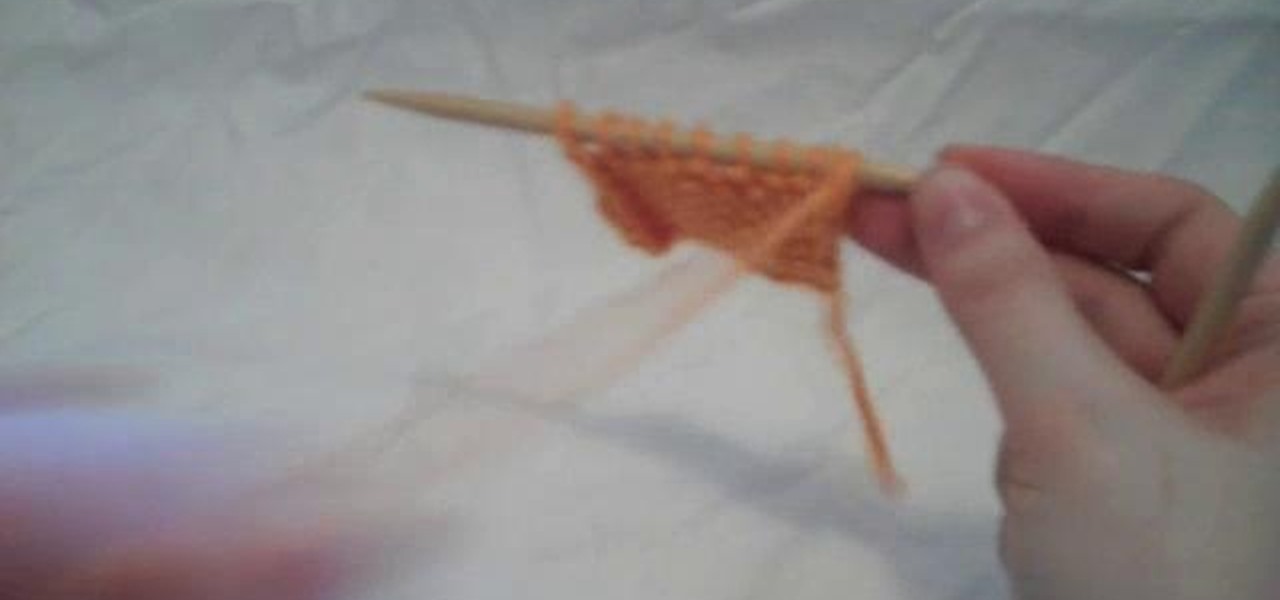
How To: Knit a lace crochet pattern
Lace yarn is not a very pretentious crafting medium. Lightweight and delicate, lace yarn is used by knitters to crochet lace patterns for scarves, berets, and other accessories. But turning lace yarn into said final creation is no easy walk in the park.
How To: Make tarn (t-shirt yarn) from old t-shirts
Got a bag of old t-shirts that have been with you too long that you don't want to throw them away, but are piling up too fast that you're tempted to toss them on the counter at the Salvation Army? Keep your old t-shirts by your side without compromising storage space by making tarn.
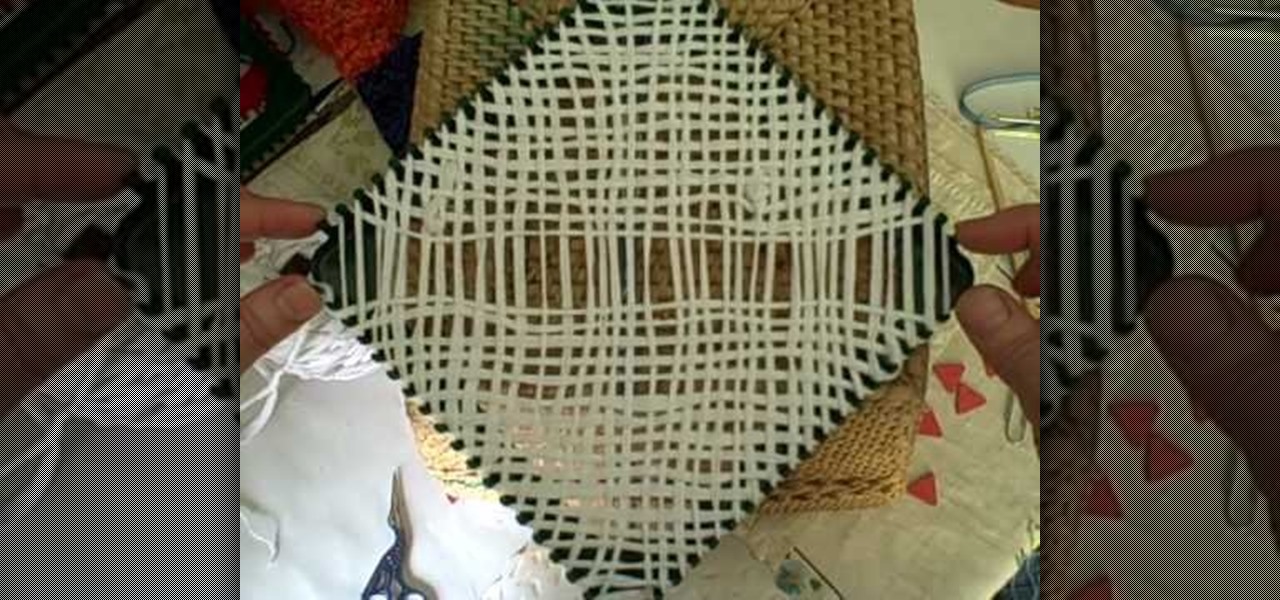
How To: Weave tarn (t-shirt yarn) on a potholder loom
A potholder loom is a square-shaped loom that allows you to weave thickly woven fabric, but often if you're not careful you can create gaps in between the yarn. But that problem will be completely solved in this video, in which you'll learn how to bypass the gaps. The result will be a basket weave-type fabric that's thick yet lightweight enough for summer scarves.

How To: Make Mexican papel picado paper cuts using chisels
This video tutorial is in the Arts & Crafts category where you will learn how to make Mexican papel picado paper cuts using chisels. This is a traditional craft of Mexico. There are various forms and sizes of chisels used for this purpose. The designs you can cut on paper are only limited by your imagination. First you got to make a design on paper. Then you got to stack up 40 to 50 sheets of paper and staple them together. Now you can start cutting the paper stack using a chisel and a hammer...

How To: Combine sewing pattern pieces for beginners
Sewing patterns are a godsend if you're a beginner at sewing who's trying to get into making clothes and accessories like scarves and bags. A pre-drawn pattern helps you learn proportions, measurements, and drafting techniques you'll need later on when you design your own clothing.

How To: Crochet a scarf using a left hand galaxy stitch
A galaxy stitch comes from a galaxy far, far away, where on a planet not unlike ours sentient beings with six arms instead of two got tired of our simple and dull-minded single and double crochets and decided to invent a star-shaped crochet that allowed at least two of their arms to remain active at any one time.

How To: Make a paper football that flies
In this tutorial, we learn how to make a paper football. First, take a piece of copy paper and fold 1/3 of the paper and crease it. Next, do this again until you reach the top of the paper, you should have three folds in total. Next, fold one side into a triangle shape, and then keep folding in until you get to the bottom of the paper. Once you reach the bottom, fold the excess paper into the pouch that you created when folding the triangle in. You will end up with a triangle shape. Now, you ...

How To: Make a ribbon bow with the help of toothpicks
In this tutorial, we learn how to make a ribbon bow with the help of toothpicks. Start with a full twist on your ribbon, then place it behind the toothpick and hold it in place with another toothpick. Next, make another loop and then do a front loop with a half of a twist. Now, secure those in place with toothpicks and do three side loops with half twists. Secure them with toothpicks, then continue with larger loops made with half twists. When finished, hold the ribbon in the middle with your...

How To: Fold a circular teabag paper
This video tutorial is in the Arts & Crafts category which will show you how to fold a circular teabag paper. This is a simple process and doesn't take much time to do. First fold the circular paper in half to get a semi-circle and then fold it in half again in to a quarter. Unfold the last fold and fold one quarter back to the halfway mark. Then turn the paper over and fold the bigger side of the paper along the fold line exactly matching the edge as shown in the video. Now you get a little ...
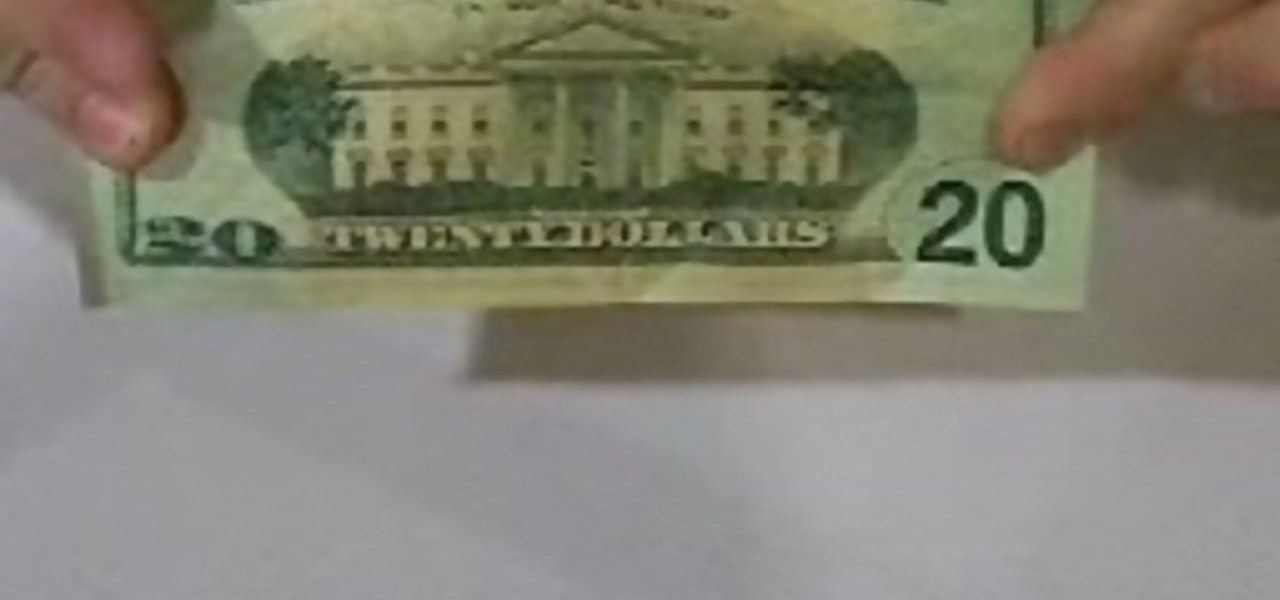
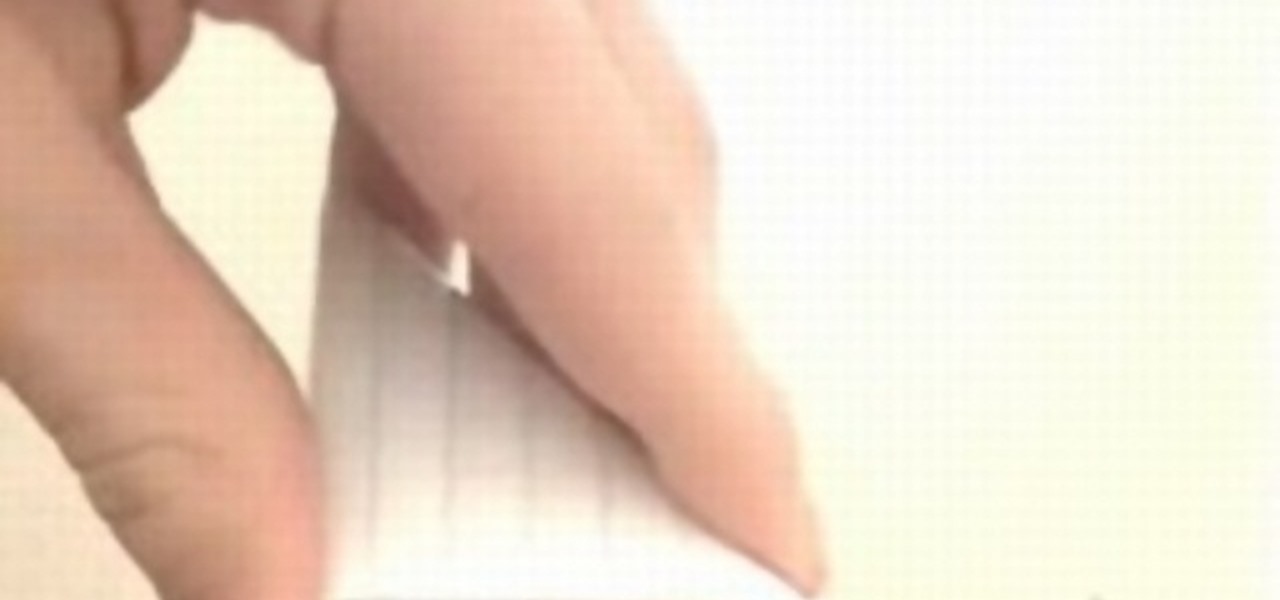
How To: Make a paper football with a 20$ bill
In this tutorial, we learn how to make a paper football with a $20 bill. First, take the bill and fold it in half length wise. Next, take the bill and fold one of the ends into a triangular shape. After this, fold the triangle over and keep doing this until you get to the end. When you reach the end, and tuck the flap on the end into the pocket you created. After this, you can hold the bill up with your fingers, and flick it with your other fingers. You can use any type of bill to make this, ...

How To: Make a scalloped edge bobby pin accessory
In order to make a scalloped edged bobby pin accessory, you will need the following: wire, a bobby pin, small beads, a ruler, and scissors. Cut about 2 feet of wire. Fold the wire in half. Lace the wire through the bobby pin. Anchor it by wrapping it around the exterior. Then, repeat with the other end of wire. You will repeat this, in order to secure each bead. Begin sliding the beads on the wire. Group three at a time, remembering to anchor them. When you reach then end, begin scalloping. A...
How To: Craft a heart shaped bookmark
In this tutorial, we learn how to make a heart bookmark. First, take a sheet of paper and fold it in half, folding the crease. Now, take a pencil and draw two heart humps from one edge to the next. After this, cut them out, leaving the fold together. Trim any edges that aren't round, then add glue to the edge of the heart, and fold it over and let it dry. You can now decorate this will markers and ribbons. To use as a bookmark place your page in the center of the heart. This is a great craft ...
How To: Create a floral antique photo stand
This video tutorial is in the Arts & Crafts category which will show you how to create a floral antique photo stand. The photo stand can be used to place photos or picture cards and it also doubles up as a candle stand. A picture holder measures 4 1/2 inches from top of the ring to the top of the stand. But, you can have different length. Take a lid of a tin and drill a small hole in the center. Place a wire through the hole. Apply generous amount of glue on the outer side of the lid. Sprinkl...
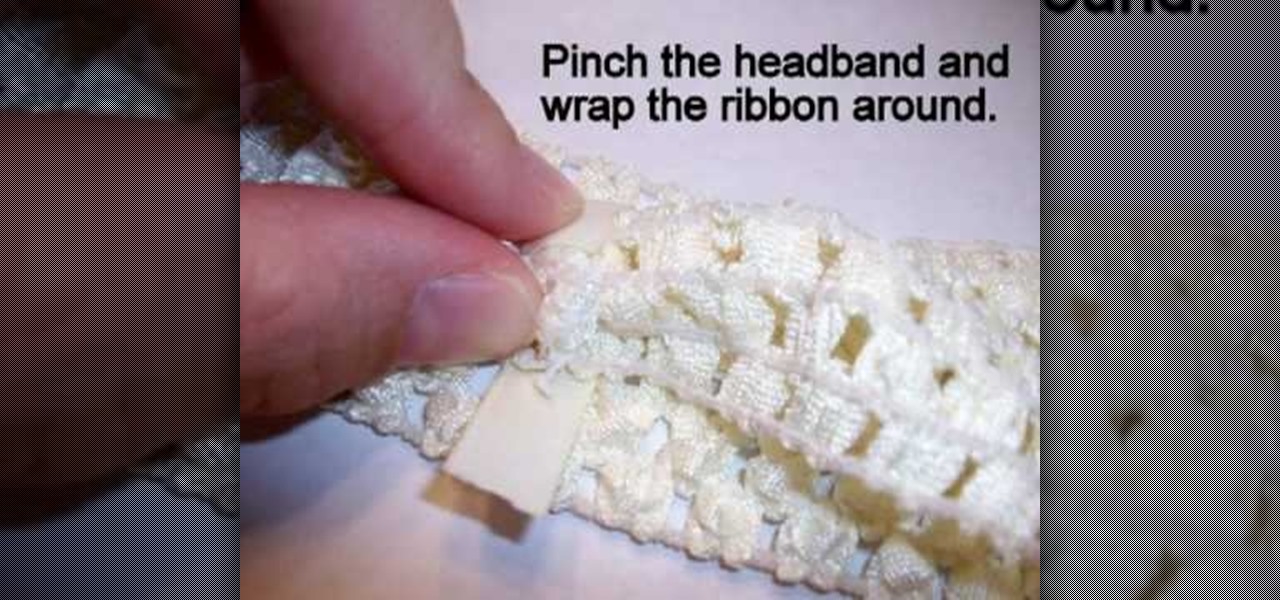
How To: Make an interchangeable crochet headband
In this video tutorial, viewers learn how to make an interchangeable headband. The materials required for this project are a crochet headband or hat and 1-3/4" of 3/8" ribbon. Begin by turning the headband inside out. Then place a small dot of hot glue onto the center of the seam and glue on end of the ribbon to the seam. Now pinch the headband and wrap the ribbon around and place a dot of glue on the ribbon. This video will benefit those viewers who enjoy making crafts and homemade accessori...

How To: Knit a bikini bottom
In this tutorial, we learn how to make a bikini bottom. First, measure the widest part of your bottom area, then write this number down. Next, place your fabric where the measurement device just was, then mark where you want your underwear to fit. Mark this spot, then measure the lines out on the fabric. After this, use a pen or marker to mark the underwear shape. After this, cut out the shape of the underwear and pin all sides together. Now, sew the sides of the bottoms together, then flip t...

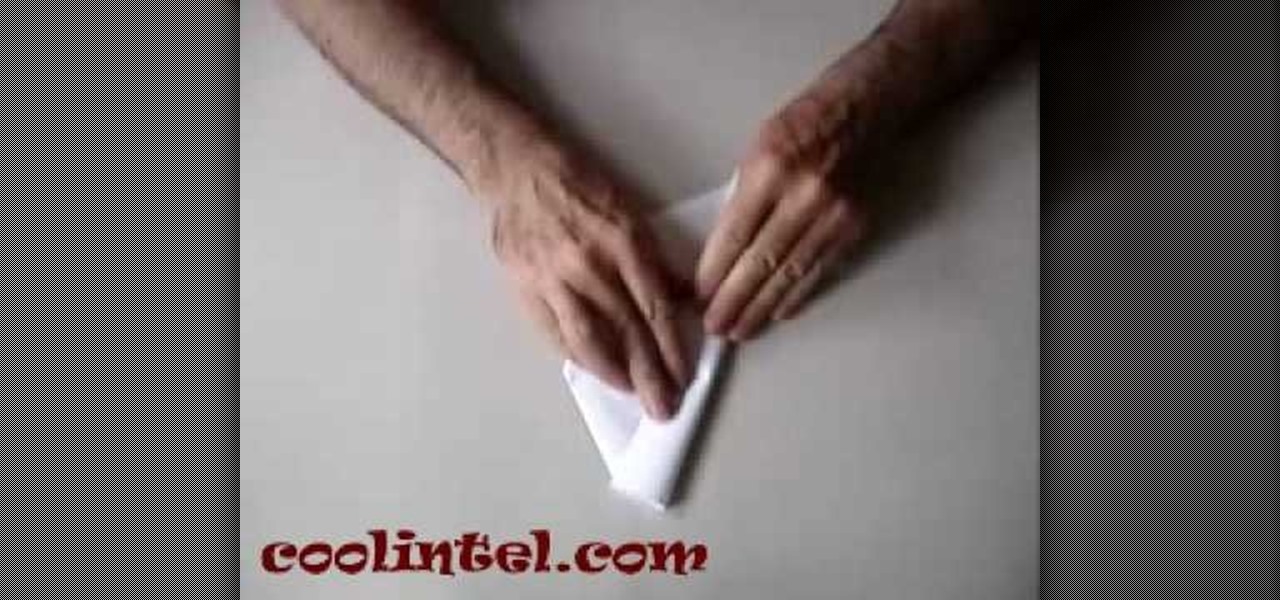
How To: Make a perfect paper football
In this tutorial, we learn how to make a perfect paper football. First, fold the paper in half, length wise. Next, fold it again the same way and fold the crease. Now, rip a small section of the top part and discard. Now, fold the paper in the middle to make a sort of "l" shape. Then fold again so you have an arrow. Now, fold all the parts together so you have a diamond shape, then tuck the end arrow into the pouch you created to have an even smaller triangle. When finished, hold the paper wi...
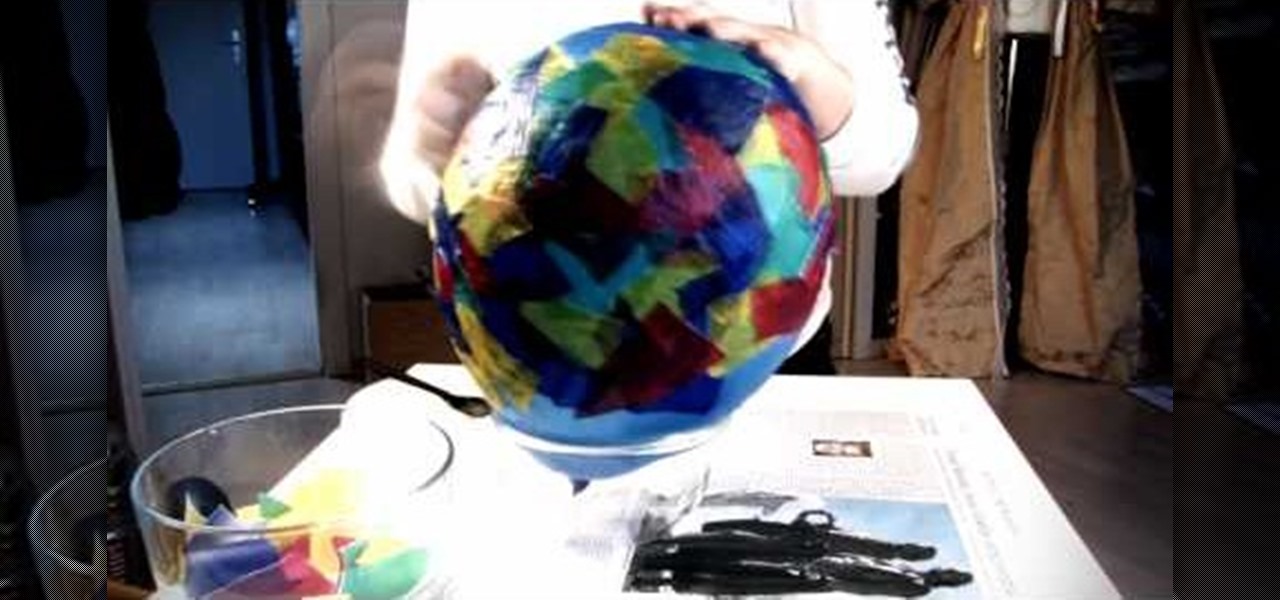
How To: Make a traditional German balloon lantern
In this video tutorial, viewers learn how to make a balloon lantern. The materials required for this project are: balloons, lantern paper, wallpaper paste, bowl and scissors. Begin by ripping the paper into small pieces and place it into the bowl. Then shake the bowl and blow up a balloon. Now put some paste onto the balloon and layer it with the lantern paper pieces. Then let the paste dry and pop the balloon. Remove the balloon and cut off the lantern edges. Finish by hanging it and add a c...
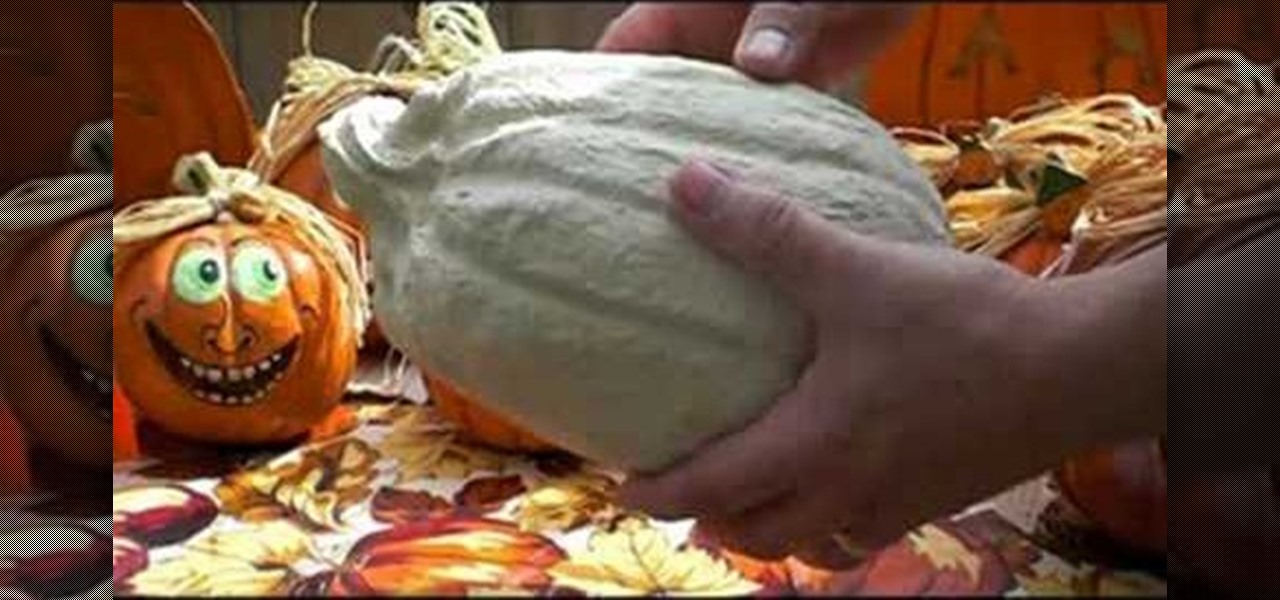
How To: Make a papier-mâché Halloween pumpkin
In this tutorial, we learn how to make paper mache Halloween pumpkins. You can purchase the pumpkin already made in the correct shape. When you are read to paint it, use orange pain and then a darker color in the creases to make it look realistic. You may need to smooth the pumpkin out before you paint, to make it easier to paint. Let the paint dry when finished, then add a gloss on. You can also paint on faces and different designs if you want to spice things up. You don't have to paint them...

How To: Make different kinds of paper footballs
In this video tutorial, viewers learn how to make paper footballs. Begin by cutting a straight strip of paper. The wider the width, the larger the football will be. Then fold the edge into a right triangle shape and continue folding the strip in the right triangle pattern. Once you have reached the end of the strip, tear off the end at an angle and tuck it in the side of the football. This video also shows viewers how to play a game with the paper football. This video will benefit those viewe...

How To: Make a spring themed pop up card
In order to make a spring card, you will need the following: a 5 x 10 inch piece of card stock, 3 x 3 inch paper, glue, triangles, stickers, and a cutter.

How To: Sew ruffles three different ways
In this tutorial, we learn three different ways to sew ruffles. The first way, you will put your sewing machine setting on the highest, then take your fabric and place it underneath the needle. Let the fabric go through the machine and ruffles will start to create when it's ran through a couple of times! The next way is to scrunch the fabric together while it's underneath the needle on the machine, and sew the fabric completely together. Be careful not to hurt your fingers during this! the la...

How To: Make a dangling picture frame
This video tutorial is in the Arts & Crafts which will show you how to make a dangling picture frame. You will need pictures that you want to frame, old CD cases, a drill with a very thin drill bit and fishing line. Remove all paper from inside the CD cases, cut the pictures to the size of the CD case and place two pictures inside one case back to back. Next you drill a small hole at the top and the bottom of the case in the center. String one CD case with another with the fishing line. You c...
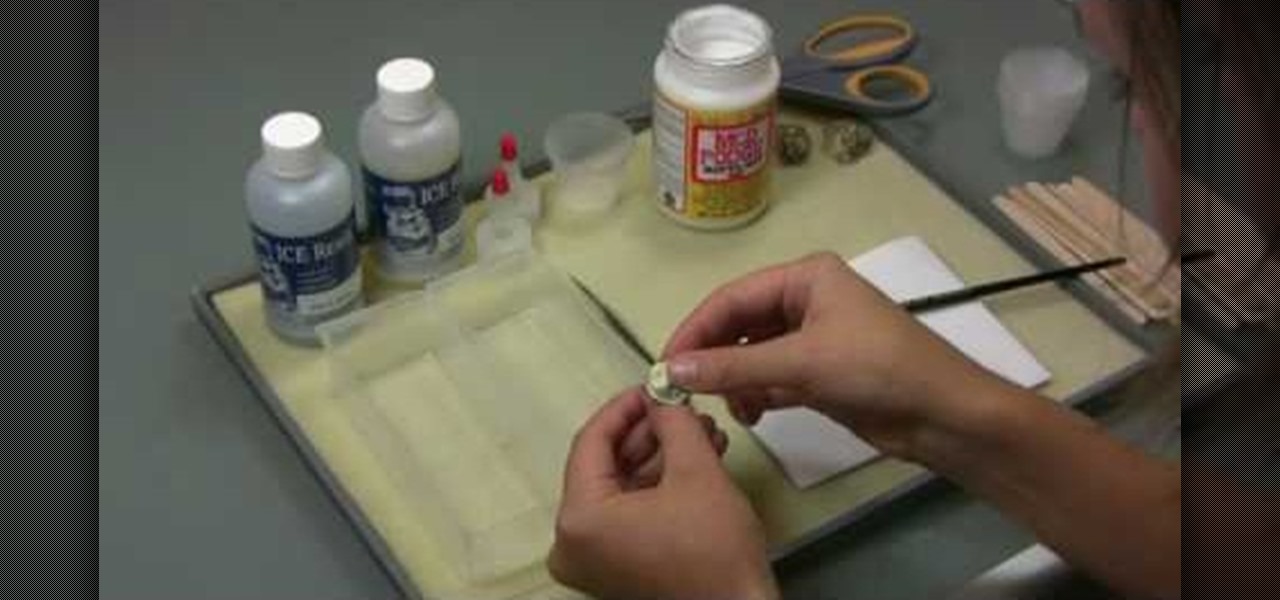
How To: Use ICE Resin to make resin jewelry
In this Arts & Crafts video tutorial you will learn how to use ICE Resin to make resin jewelry. ICE resin should be used in a well ventilated room and be sure to follow manufacturer's recommendations. The kit comes with mixing cups and sticks. Additionally you will need a paint brush, scissors, sponge and needles. Once you mix the resin and the hardener, you got to use it within 30 minutes. Curing time is 24 hours at 72 degrees Fahrenheit, which is the room temperature. You can make it faster...
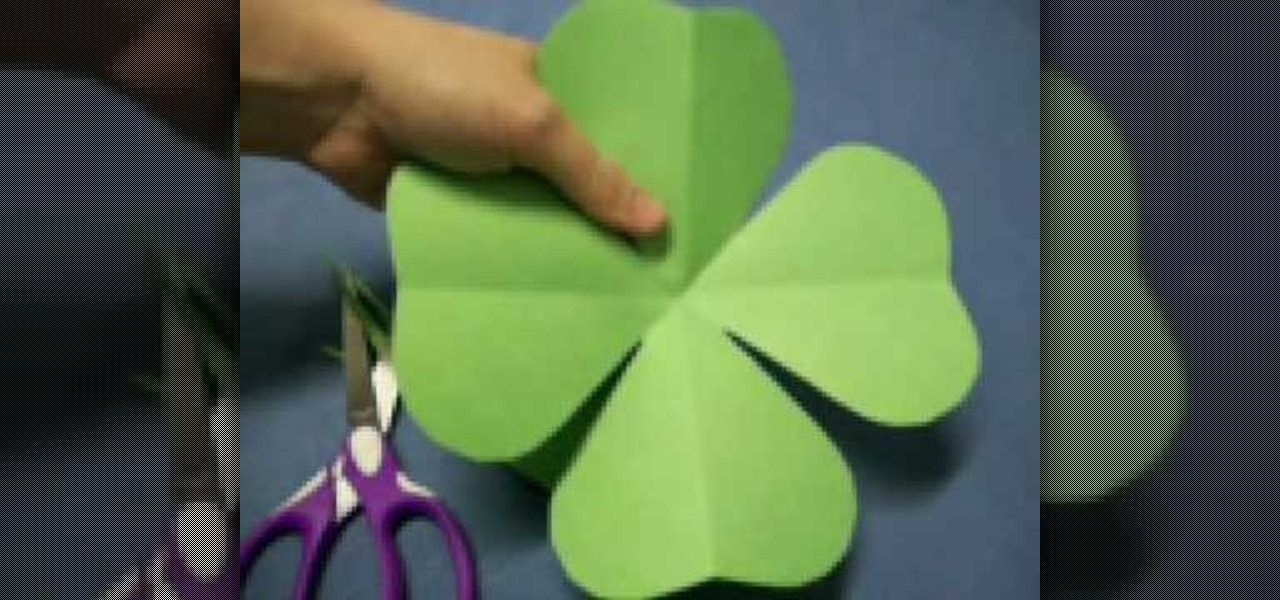
How To: Make a four leaf clover pattern
In this tutorial, we learn how to make a four leaf clover pattern. First, fold your paper in half, then fold it in half in the other direction. Next, fold the edges making a point and then cut a half an inch along the edge, making a cone shape. end the shape on the right side, making a heart shape. When you unfold, you will have a four leaf clover! You can use any size of paper to make this, just make sure you use green paper to keep the theme Irish. This is a great project for kids to learn ...
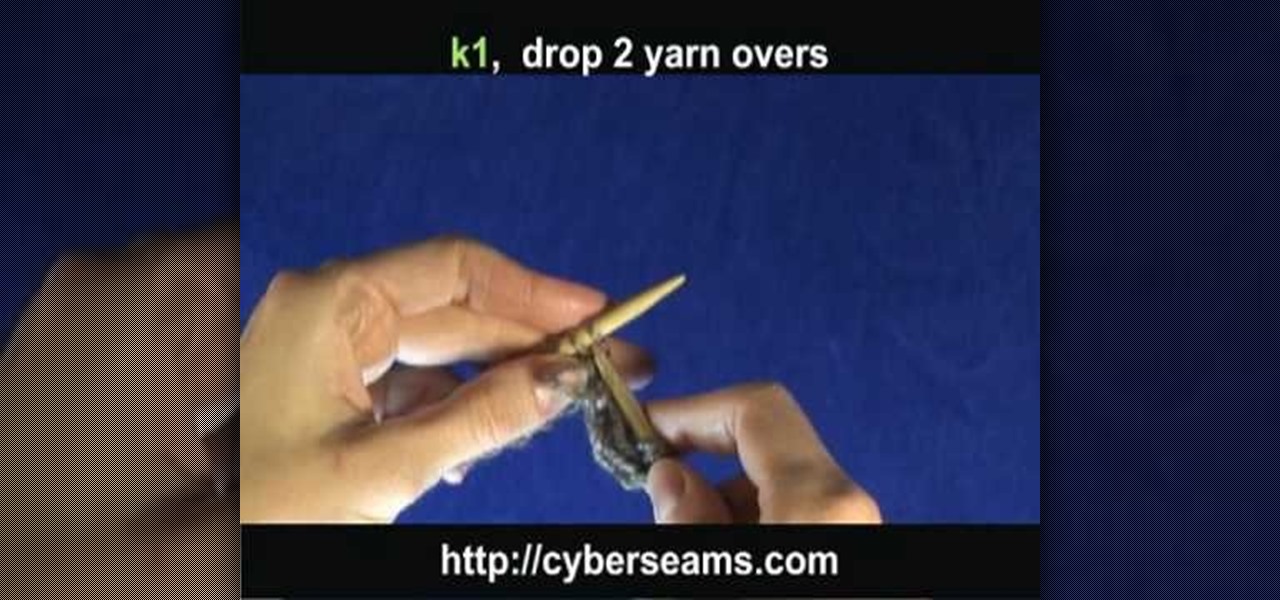
How To: Knit a scarf pattern
In this tutorial, we learn how to knit a scarf pattern. To do this, you will first start by casting on the first 20 rows. After this, you will knit for 2 rows, then you will do a k1 knit followed by a k1 at the end. Repeat this until your scarf is the desired length. Bind the knit off at the end and cut off any additional string that is left over. When finished, you will have a beautiful scarf that will keep you warm and was made by you! If you aren't familiar with knitting, you will have to ...

How To: Make an origami cat face for origami beginners
Origami seems super complicated if you're just starting out. After all, with projects like 30-sided modular spheres and magic cubes, it's easy to find your beginner level crane a bit pathetic.
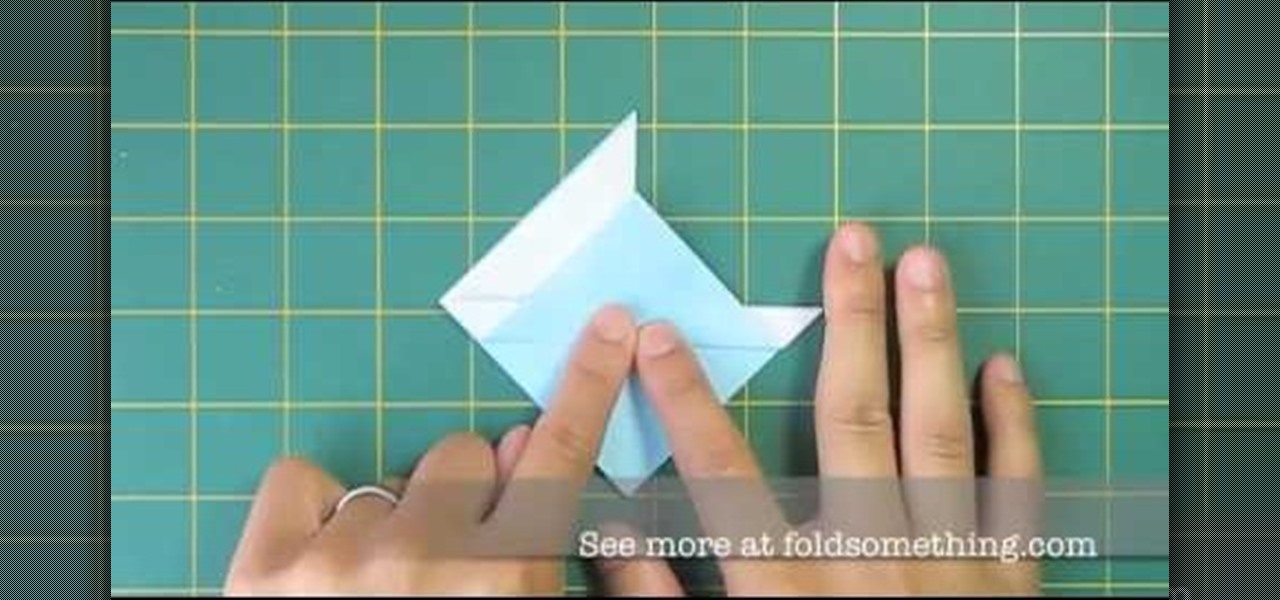
How To: Fold a simple origami sailboat with one sheet of paper
If you love boats but hate the open waters, the best thing you could probably do is get over your fear, or… grab some paper and make an origami sailboat. You won't need to take your feet off land with this kind of boat, unless you're jumping for joy after successful completion. This is one of the simplest origami sailboat designs out there, and requires only one sheet of origami paper.
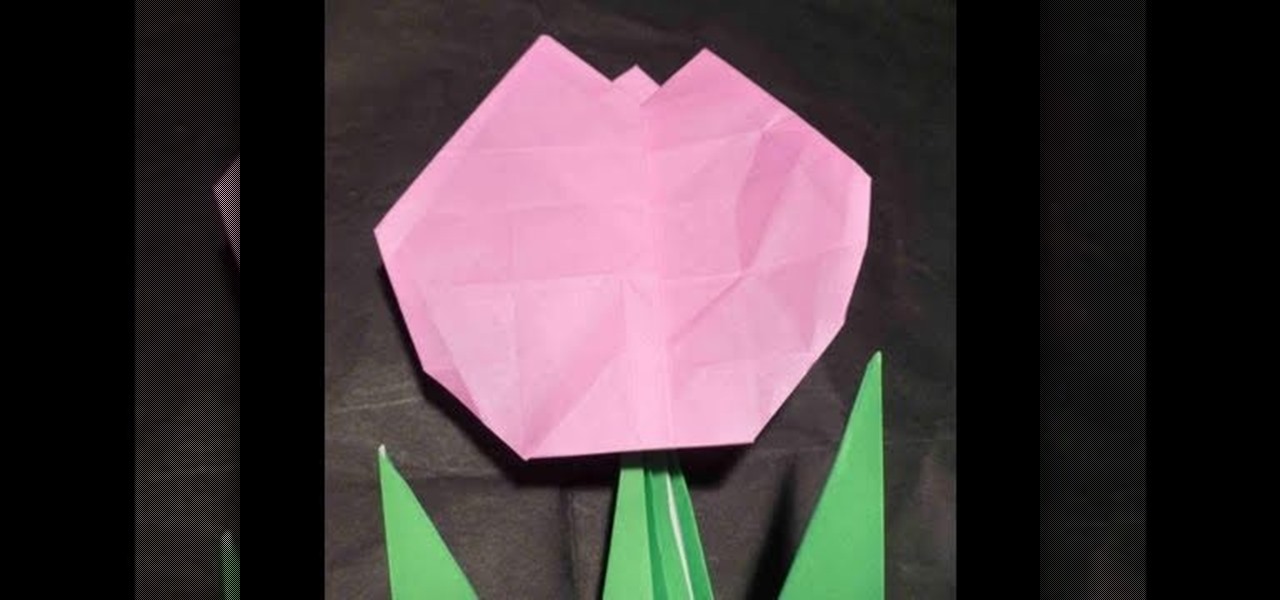
How To: Make a pretty in pink origami tulip flower
In our opinion, fake flowers are much better than the real things. While we're never going to turn down a handsome lad knocking at our door with a bursting bouquet of peonies in one hand and a box of chocolates in the other, fake flowers - in origami form - last far longer.

How To: Craft a delicate origami tulip leaf
In our opinion, fake flowers are much better than the real things. While we're never going to turn down a handsome lad knocking at our door with a bursting bouquet of peonies in one hand and a box of chocolates in the other, fake flowers - in origami form - last far longer.
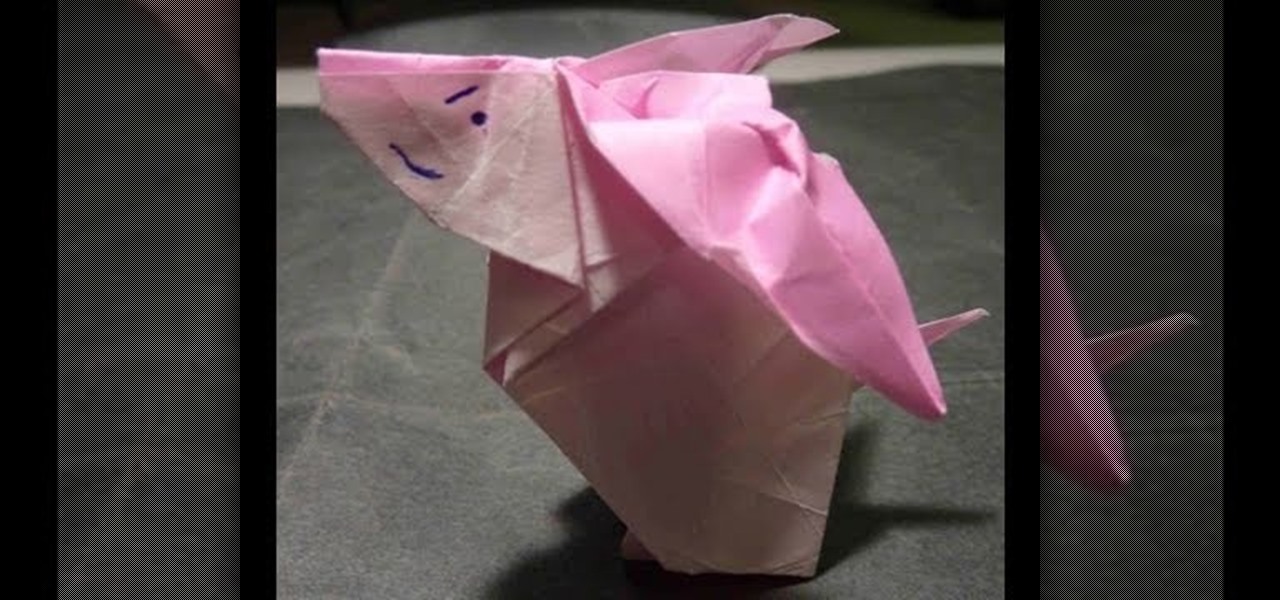
How To: Make a cute 3D origami bunny rabbit
Bunny rabbits don't only have to be reserved for Easter. In fact, bunnies are pretty darn cute all year round. While real bunnies, with their fuzzy fur and floppy ears, are the most cuddly and endearing, for those who can't raise one in their homes, this origami bunny is the next best thing.

How To: Do a stockinette stitch (St st) when knitting
In this free video knitting lesson, you'll see how to create stockinette stitch (St st) shown in the English or throwing style. For more information, including complete, step-by-step instructions, and to get started using stockinette stitches in your own knitting projects, watch this helpful video guide.
How To: Bind off on the purl side continental-style
This free video knitting lesson presents an overview of how to bind off when your pattern calls for you to bind off on the purl side of your work, shown in the continental style. For more information, including detailed, step-by-step instructions, and to get started binding off on the purl side when knitting yourself, watch this helpful video guide.
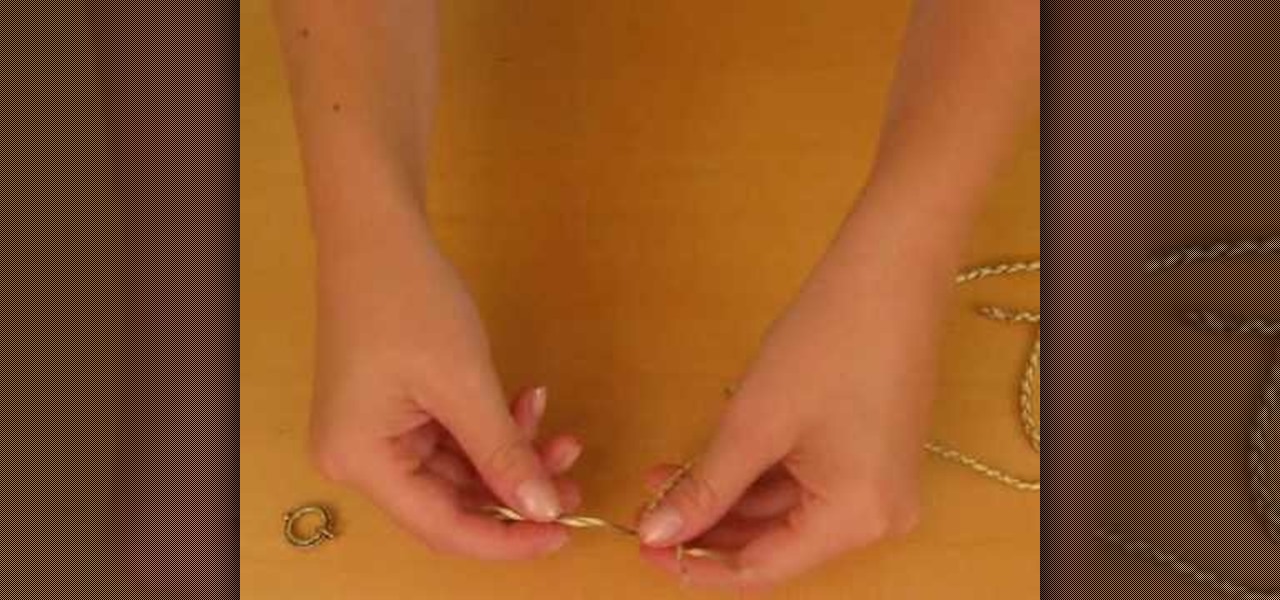
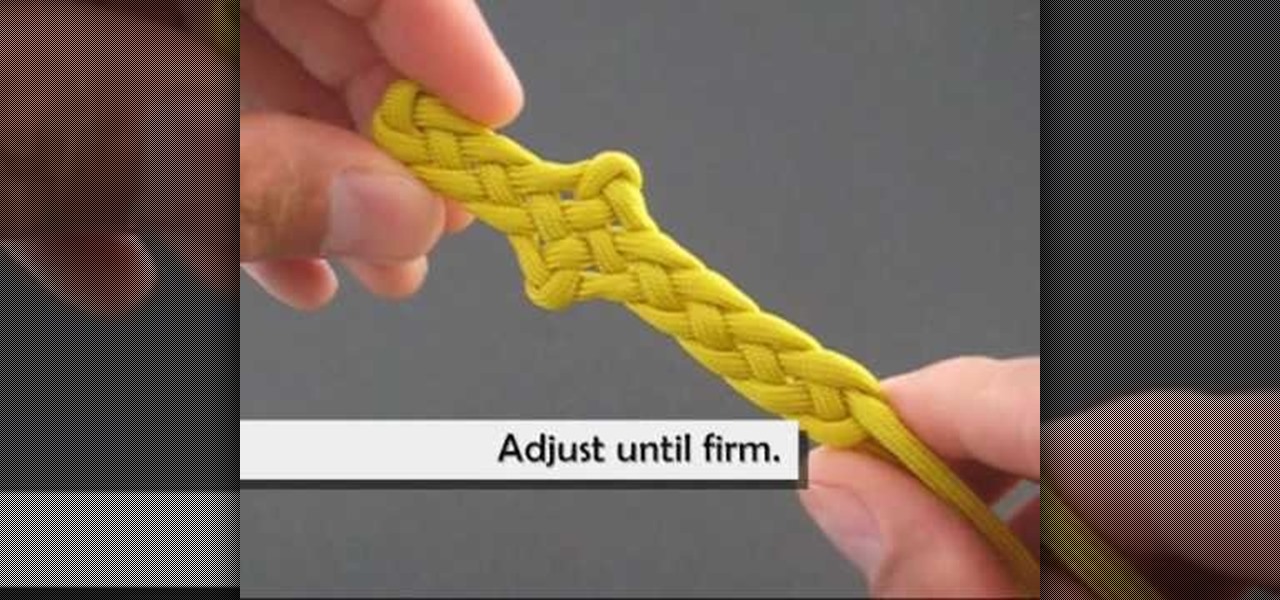
How To: Make a nautical inspired braided bracelet for summer
In this tutorial, Missa shows you how to add a cute nautical bracelet to your look and stand out this summer. This bracelet is easy to make yourself and quick to do. Give yourself a little bit of the sea with this adorable piece of jewelry.

How To: Make a handmade gift bag
In this video, you will learn how to create a custom gift bag. Before you watch, you will want to download the pdf template for the bag, by visiting artycrafty.wordpress.com. First, you will print the template out onto decorative craft paper, which should be A4 letter-sized. Next, you will cut around the solid lines, as shown on the template, and cut out any additional decorative stencils, as you wish. While watching the video, you are free to decorate the pieces of paper any way you would li...
How To: Weave with paper index cards with Make Magazine
Learn how to weave with Travis Meinolf who's featured on the cover of CRAFT: 08, the Weaving issue. He explains how to make weaving loom out of 3 X 5" notecards, yarn and a pencil. After assembling the basic structure of the loom, create tension in the loom by attaching one end of the loom to the wall and the other end to one's waist. With a shuttle, it is possible to begin making creative woven fabrics in a matter of minutes.
How To: Easily tie a Celtic dagger knot
When you think of a dagger, you imagine a weapon that is small in stature, but useful for thrusting and cutting things. This next tutorial is going to show you something that is incapable of performing those tasks.